
 Harriet Wetton

If you have ever tried to mount a heavy wooden shelf, secure a shaky bookshelf to a wall, or build custom outdoor furniture, you know the frustration of unstable joints. You tighten every screw, step back to admire your work, and notice a worrying wobble.
standard fasteners or cheap plastic corner braces bend under light weight, rust when exposed to moisture, or pull away from the wood entirely.
This guide eliminates that confusion. Corner braces, commonly known as stainless steel L brackets, offer one of the most reliable ways to join two surfaces at a perfect 90 degree angle.
Whether you are a beginner taking on your first DIY home improvement project or an experienced maker building heavy duty structural frameworks, understanding how to choose, size, install, and maintain these simple metal connectors saves time, money, and stress.
What Is a Stainless Steel L Bracket?
A stainless steel L bracket is a rigid, right angled metal fastener shaped like the capital letter L. It features two flat arms, or legs, connected at a precise 90 degree corner. Each arm contains pre drilled holes designed to accept screws, bolts, or anchors.
Vertical Leg (Top to Bottom):
-
Screw Hole
-
Screw Hole
Horizontal Leg (Left to Right):
-
Screw Hole
-
Screw Hole
-
Screw Hole
These simple components serve as structural bridges across two perpendicular surfaces. By transferring forces across both legs, they prevent joint movement, reduce stress on primary fasteners, and prevent wood or metal frames from twisting under load.
Why Stainless Steel Matters
Not all metal brackets perform equally. Standard carbon steel brackets are strong, but they corrode rapidly when exposed to moisture, humidity, or outdoor elements.
Zinc plated steel offers temporary protection, but the thin coating wears away over time or scratches during installation.
Stainless steel contains chromium, an element that reacts with oxygen to form an invisible, self healing layer of chromium oxide across the surface of the metal. This protective barrier stops water and oxygen from reaching the underlying iron, preventing rust and degradation for decades.
| Feature | Standard Steel | Stainless Steel |
| Rust Resistance | Low (Requires paint) | High (Self-healing) |
| Outdoor Use | Not Recommended | Ideal |
| Load Durability | High (Until rusted) | High (Long-term) |
| Appearance | Industrial / Rough | Clean / Polished |
Why Stainless Steel L Brackets Are Essential for Modern Projects
Whether you are building indoor furniture or outdoor garden features, stainless steel corner braces solve core structural problems that other hardware cannot match.
1. Exceptional Strength-to-Size Ratio
Stainless steel possesses high tensile strength. This allows thin gauge metal to support significant loads without bending or snapping. You can achieve structural stability without adding bulky, unappealing blocks of wood or thick metal gussets to your project.
2. Complete Weather and Moisture Resistance
Bathrooms, kitchens, outdoor decks, and marine environments present harsh conditions for hardware. High humidity, steam, rain, and saltwater quickly degrade standard hardware. Stainless steel L brackets remain rust free in damp spaces, ensuring your installations stay secure year after year.
3. Long Term Cost Efficiency
Inexpensive non stainless brackets might save a few dollars upfront, but rust stains can ruin finished woodwork, and structural failure requires costly repairs. Investing in quality stainless steel hardware avoids replacement costs and project failures later.
4. Clean, Professional Aesthetic
With finishes ranging from brushed satin to mirror polish, stainless steel brackets offer a sleek modern look. Instead of hiding your structural hardware, you can leave polished metal components visible as design accents.
Understanding Stainless Steel Grades and Types
Selecting the correct stainless steel grade ensures your installation survives its environment without unexpected corrosion or failure.
Grade 304 (Standard Indoor and Outdoor Use)
Grade 304 is the most versatile and widely used stainless steel. It contains approximately 18 percent chromium and 8 percent nickel, giving it strong resistance to rust and chemical exposure.
-
Best used for: Indoor furniture, wall mounting, kitchen shelving, garage organization, and general outdoor woodworking projects not exposed to salt air.
Grade 316 (Marine Grade and Extreme Environments)
Grade 316 includes added molybdenum, an element that significantly boosts resistance to chlorides, industrial chemicals, and saltwater.
-
Best used for: Coastal decks, boat fittings, outdoor structures near saltwater pools, and commercial food preparation facilities.
Heavy Duty vs. Light Duty Styles
-
Flat L Brackets: Standard flat metal bent at 90 degrees. Ideal for light to medium shelf support, picture frames, cabinet construction, and furniture repair.
-
Gusseted L Brackets: Feature a triangular metal ridge or welded cross bar welded into the inside curve of the angle. This gusset prevents the metal from bending under extreme downward pressure, making these ideal for heavy workbenches, equipment supports, and granite countertop bracing.
Sizing and Load Capacity: Getting the Right Fit
Choosing the wrong bracket size leads to sagging shelves and structural instability. Before buying hardware, consider both the physical dimensions and the weight requirements of your build.
How to Measure an L Bracket
Brackets are specified by leg length, width, and metal thickness:
-
Leg Length: Measured from the outer corner to the end of each arm (for example, 2 inches by 2 inches, or 4 inches by 6 inches).
-
Width: The width of the metal strap across the arm.
-
Thickness (Gauge): The thickness of the metal plate itself. Thicker gauge material resists flex under heavy loads.
When planning precise wood cuts or measuring clearances for hardware installations, understanding exact spatial measurements is critical. For instance, knowing how big is 2 cm helps when selecting screw lengths, checking bracket arm widths, or spacing small corner supports on delicate woodworking builds.
-
Thickness: The measurement of the metal plate’s width along its thin edge.
-
Leg 1 Length: The height of the vertical arm, measured from the outer corner to the top end.
-
Leg 2 Length: The distance of the horizontal arm, measured from the outer corner to the far right end.
Estimating Load Requirements
Load capacity depends on several factor beyond metal strength alone:
-
Wall Material: A bracket screwed directly into a solid wood wall stud holds significantly more weight than one mounted into drywall using plastic anchors.
-
Leverage (Load Distance): The further a heavy object sits from the wall or mounting point, the more rotational force (torque) it places on the top screw of the bracket.
-
Fastener Quality: Using weak or undersized screws creates a point of failure, regardless of how strong the steel bracket is.
As a general guideline:
-
Small (1 inch to 2 inch legs): Holds 10 to 30 pounds per pair. Great for light framing, small wall art, or cabinet doors.
-
Medium (3 inch to 5 inch legs): Holds 40 to 100 pounds per pair. Ideal for standard wall shelves, light furniture, and desk support.
-
Heavy Duty Gusseted (6 inches and larger): Holds 150 to 500+ pounds per pair when anchored into solid wood studs or masonry. Perfect for stone countertops, heavy utility shelves, and structural framing.
Step-by-Step Installation Guide
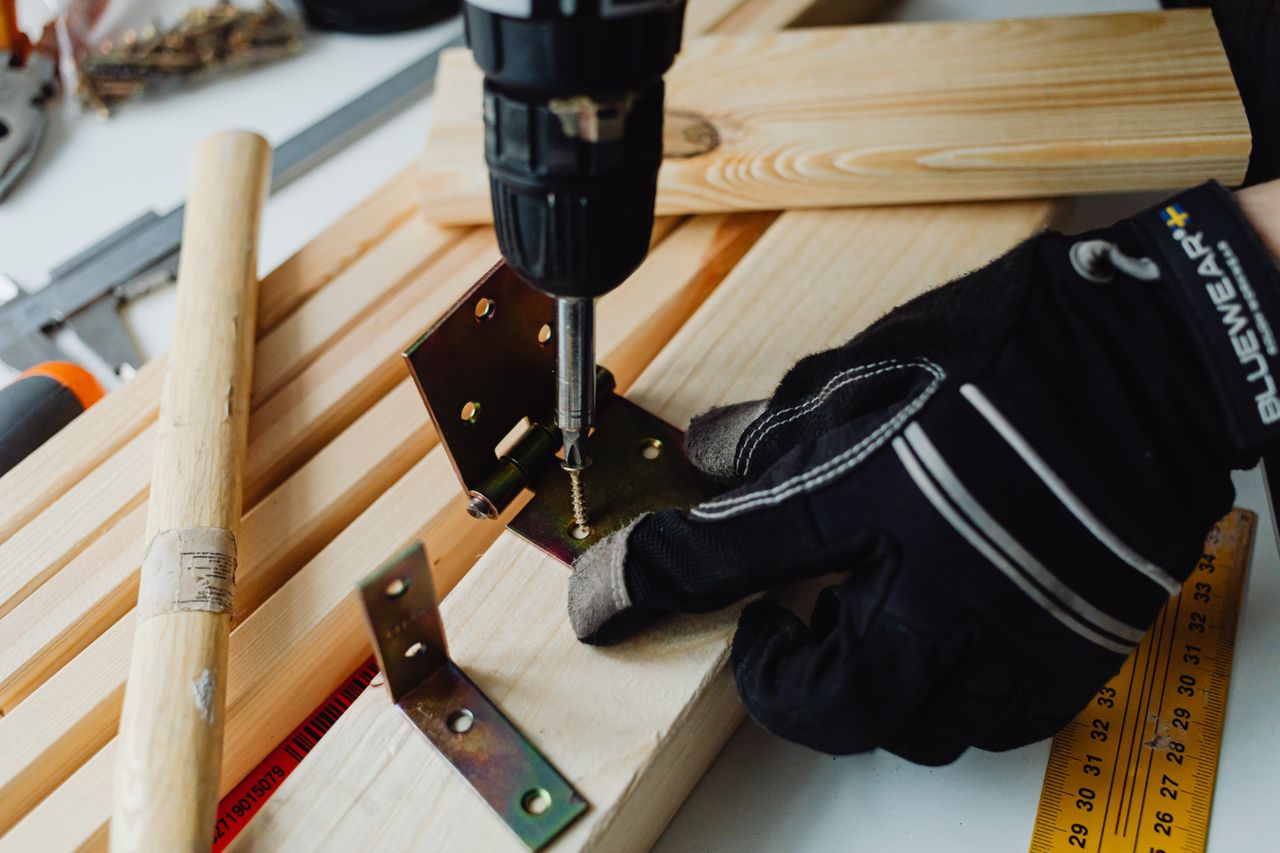
Proper installation ensures maximum load capacity and prevents damage to your walls or furniture.
| Step | Action | Description |
| 1 | Mark & Measure | Align bracket with bubble level and mark hole centers with a pencil. |
| 2 | Drill Pilot Holes | Drill pilot holes using a bit slightly smaller than screw shank. |
| 3 | Position & Drive Screws | Hold bracket flush, drive top screw loosely, verify level, then drive remaining screws. |
| 4 | Final Tightening | Hand-tighten all screws securely without over-torquing. |
Tools Required
-
Stainless steel L brackets
-
Stainless steel screws (matched to bracket hole countersinks)
-
Pencil or marking tool
-
Bubble level
-
Tape measure
-
Electric drill and driver bits
-
Correctly sized drill bits for pilot holes
-
Wall studs finder (for wall mounting)
Step 1: Mark Your Mounting Points
Place the bracket against your mounting surface. Use a bubble level to ensure the vertical arm is straight and the horizontal arm sits level. Mark the centers of all screw holes using a sharp pencil.
Step 2: Drill Precise Pilot Holes
Never drive screws directly into solid wood or masonry without drilling pilot holes first. Driving screws without pilot holes can split wood, strip screw heads, or force the bracket out of alignment.
Choose a drill bit with a diameter slightly smaller than the solid shank of your screw (ignoring the outer screw threads). Drill straight into your marked locations to the full depth of the screw length.
Step 3: Align and Mount the Bracket
Hold the bracket over your pre drilled holes. Drive the primary screw into the top mounting hole first, but do not tighten it down completely. Re check your alignment with the bubble level.
Drive the remaining screws into place once you confirm the bracket is level and plumb.
Step 4: Final Tightening and Inspection
Tighten all screws securely by hand or with low drill torque settings. Avoid over tightening, which can strip out pilot holes in soft wood or snap screw heads off. Ensure the bracket sits flush against both surfaces with no gaps.
Real-Life Examples and Applications
Example 1: Eliminating Wobble in Wooden Dining Chairs
A common household frustration is a dining chair that creaks and sways whenever someone sits down. Traditional wooden dowels or glue joints inside chair legs loosen over years of use.
Solution: Installing 1.5 inch stainless steel L brackets beneath the chair seat corner frames reinforces the joint. Because the brackets are hidden under the seat apron, the chair regains structural stability without changing its outward appearance.
Example 2: Mounting Floating Kitchen Storage Shelves
A homeowner wanted open shelving in a kitchen to store heavy ceramic dinnerware and iron cookware. Moisture from cooking steam ruled out standard iron or plain steel hardware, and cheap plastic supports sagged under test loads.
Solution: The homeowner installed heavy duty gusseted Grade 304 stainless steel L brackets anchored directly into vertical wall studs. The brackets easily supported over 150 pounds of cookware while remaining clean and rust free despite daily kitchen humidity.
Common Mistakes to Avoid
Even high quality hardware fails if installed incorrectly. Avoid these common installation errors:
1. Mixing Dissimilar Metals (Galvanic Corrosion)
When two different metals touch in the presence of moisture, an electrochemical reaction called galvanic corrosion occurs. This causes the weaker metal to corrode rapidly.
-
Mistake: Fasteners made of standard carbon steel or zinc plating driven through stainless steel bracket holes.
-
Fix: Always match your hardware. Use stainless steel screws and bolts when installing stainless steel brackets.
2. Relying Solely on Drywall Anchors for Heavy Loads
Drywall anchors hold light loads, but heavy floating shelves or hanging cabinets require mechanical fastening into solid structural wood studs or masonry walls.
-
Fix: Use a stud finder to locate solid wall studs. If you must mount into hollow drywall, limit weight drastically or use heavy duty toggle bolts.
3. Drilling Pilot Holes Too Large or Too Small
-
Too Large: Threads will not bite into the material, causing screws to pull out under light tension.
-
Too Small: Screws become hard to drive, risking stripped screw heads or split wood.
4. Over Tightening Screws
Applying excess torque when driving screws can shear off stainless steel screw heads or strip out soft wood fibers. Set your drill clutch low or perform final turns with a manual hand screwdriver.
Advanced Strategies for Maximum Structural Support
For specialized or heavy duty projects, applying advanced installation techniques ensures total structural stability.
Creating Flush Surfaces with Countersunk Holes
Quality stainless steel brackets feature countersunk screw holes, tapered openings designed to swallow flat head screw tops.
Ensure your chosen screws match the angle of the bracket countersink so screw heads sit flush with the metal surface. Flush screw heads prevent snagging and allow objects to sit flat against the bracket arm.
Custom Metal Framing Integration
In modern interior design and shop builds, makers combine wood, glass, and metal elements into custom frameworks. When working with custom metal structures or structural framing, combining different structural shapes improves strength.
For instance, builders often use an aluminum h-channel to join panels or hold partition boards securely, while using stainless steel corner brackets at structural intersections to handle heavy load transfers and maintain rigid right angles.
Dampening Vibration and Thermal Expansion
In outdoor structures like pergolas, decks, or trailer builds, temperature swings cause materials to expand and contract. Adding thin neoprene or rubber washers between stainless steel brackets and mounting surfaces prevents squeaking, dampens vibration, and absorbs structural shifting without loosening hardware.
Related Hardware Subtopics
When designing structural projects, L brackets work alongside several complementary hardware components:
-
T Straps and Flat Mending Plates: Used for flat, surface level wood joints where 90 degree bends are not needed.
-
Corner Braces vs. Angle Iron: Comparing short individual bracket units against continuous structural angle stock for heavy building frames.
-
Masonry Anchors and Expansion Bolts: Securing stainless steel brackets into solid concrete, brick, or cinder block structures.
-
Countersunk Flat Head vs. Pan Head Screws: Selecting screw head geometries for flush vs. low profile surface finishes.
-
Stainless Steel Cleaning and Maintenance: Restoring shine and removing surface contaminants from stainless steel hardware in outdoor environments.
When to Seek Professional Assistance
While most L bracket installations are straightforward DIY tasks, certain projects require professional design or installation:
-
Structural Wall Modifications: Load bearing wall alterations or outdoor deck ledger attachment should be reviewed by a licensed contractor or structural engineer.
-
Heavy Overhead Fixtures: Installing heavy overhead storage units or commercial fixtures requires specialized anchor calculations to meet building codes and safety regulations.
-
Commercial Building Code Compliance: Public spaces, retail displays, and commercial kitchens must meet strict safety and local accessibility codes.
If you are unsure about wall load capacity, structural stability, or choosing the correct fastener system for heavy loads, consult a local carpenter, general contractor, or structural specialist.
Future Trends in Structural Hardware and Fasteners
Structural hardware design continues to evolve alongside new building materials and modern design aesthetics:
-
Concealed and Blind Fastening Systems: Manufacturers are designing corner brackets with snap-on covers or hidden mechanical interlocks that conceal all screw heads, delivering ultra clean, minimalist visuals.
-
Advanced Corrosion Coatings: While standard stainless steel handles moisture well, new nano ceramic and matte black physical vapor deposition (PVD) finishes give stainless steel enhanced chemical resistance alongside trendy dark visual finishes.
-
Sustainable and Recycled Metallurgy: Modern architectural hardware relies increasingly on recycled stainless steel alloys, offering eco friendly building supplies without sacrificing structural strength or longevity.
Conclusion
Stainless steel L brackets are simple, reliable components that provide strength, stability, and rust resistance for indoor and outdoor builds.
By understanding metal grades, sizing requirements, pilot hole techniques, and proper hardware matching, you can secure furniture, construct custom shelves, and build long lasting projects with complete confidence.
Next time you start a woodworking build or fix a wobbly frame, skip soft temporary fasteners and choose quality stainless steel hardware. Measure your layout carefully, drill proper pilot holes, use matching stainless fasteners, and enjoy a strong, worry-free installation that lasts.
Frequently Asked Questions
Will stainless steel L brackets rust outdoors?
Quality Grade 304 and Grade 316 stainless steel brackets resist rust under normal outdoor conditions.
However, Grade 304 may show surface spotting if exposed to coastal salt air or heavy pool chemicals, whereas Grade 316 remains fully protected in marine environments.
What size screws should I use with stainless steel L brackets?
Select screws that match the countersink holes of your bracket so the heads sit flush. The length of the screw depends on the depth of your mounting material, ensuring maximum thread engagement without driving through the opposite side of the wood.
Can I paint stainless steel L brackets?
Yes, but stainless steel requires proper surface preparation. You must sand the smooth metal surface lightly to create texture, clean it thoroughly with a solvent, apply a self-etching primer, and finish with a durable topcoat spray paint designed for metal.
What is the difference between an L bracket and a corner brace?
The terms are used interchangeably. Both refer to 90 degree right angle metal connectors designed to reinforce corners or mount flat surfaces at right angles.
Why do stainless steel screws break when driving into hard wood?
Stainless steel is softer than hardened carbon steel. If you try to drive stainless screws into dense hardwoods without drilling a full depth pilot hole, friction and torque will shear the screw head off. Always drill pilot holes first.
How much weight can a pair of stainless steel brackets hold?
Weight limits vary depending on bracket size, material thickness, gusset design, and wall anchoring depth. Light duty brackets hold 10 to 30 pounds per pair, while heavy duty gusseted brackets mounted into solid wood wall studs can hold several hundred pounds.