 Harriet Wetton
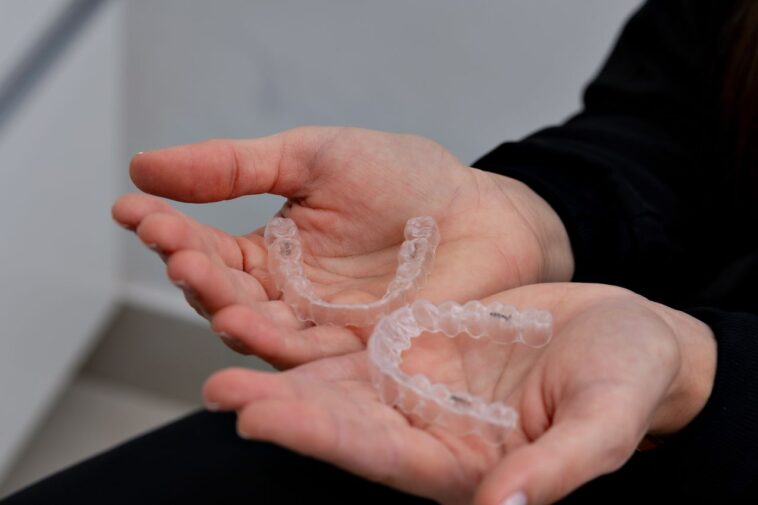
Retainers keep your smile straight after months or years of wearing braces or clear aligners. You worked hard for that perfect smile, and your retainer is the guardian that protects your investment. However, keeping that little piece of plastic or metal clean can feel like a daily chore.
Have you ever opened your retainer case and noticed a strange, foul smell? Or maybe you looked closely at your retainer and saw a cloudy, white film or small yellow spots stuck to the surface. It is frustrating, slightly embarrassing, and very common.
Many people struggle with dirty, smelly retainers simply because no one ever taught them the right way to clean them. Using the wrong soap, scrubbing too hard, or soaking them in hot water can ruin your retainer completely.
This guide will show you exactly how to clean retainers safely and effectively. You will learn daily habits, deep cleaning methods, common mistakes to avoid, and simple tricks to keep your mouth fresh and your retainer clear for years to come.
What Is a Retainer and Why Does It Get Dirty So Quickly?
A retainer is a custom-made dental device designed to hold your teeth in their new positions after orthodontic treatment. Teeth naturally want to shift back to their old places over time. Your retainer prevents this movement by applying constant, light pressure.
There are 3 main types of retainers:
-
Clear Plastic Retainers: Often called Essix or Vivera retainers. They fit snugly over your teeth like thin, clear trays.
-
Hawley Retainers: Made of sturdy acrylic that rests against the roof of your mouth or lower gumline, connected to a metal wire that runs across the front of your teeth.
-
Permanent or Bonded Retainers: A solid metal wire glued directly to the back of your front teeth.
Why Retainers Collect Bacteria and Plaque
Your mouth is naturally full of bacteria, saliva, proteins, and leftover food particles. Every time you pop your retainer into your mouth, these elements build up on its surface.
Saliva contains minerals like calcium. When saliva dries on your retainer, these minerals harden into a solid white or yellowish coating called tartar or calculus.
Bacteria thrive inside this mineral layer. If you leave your retainer uncleaned, these bacteria multiply rapidly, leading to bad breath, unpleasant tastes, and potential oral health issues.
According to official advice from the American Association of Orthodontists, consistent daily care and avoiding harsh abrasive cleaners are essential steps for preventing bacteria buildup without damaging the material.
Cleaning your retainer is not just about keeping it looking nice. It is a vital part of taking care of your teeth and gums. If you want to boost your overall mouth health, you might also wonder about other daily habits, such as whether you should brush your teeth before using whitening strips.
Taking care of every detail in your routine keeps your smile healthy, bright, and fresh.
Why Cleaning Your Retainer Every Single Day Matters
Skipping retainer cleaning for a few days might seem harmless, but plaque starts forming within hours. Here is why daily cleaning is so essential for your health and comfort:
1. Prevents Bad Breath
Bacteria trapped on your retainer produce sulfur compounds. These compounds cause persistent, foul breath that mints or mouthwash cannot easily hide. A fresh retainer means fresh breath.
2. Protects Your Oral Health
Wearing a dirty retainer pushes bacteria and acids directly against your teeth and gums for 8 to 12 hours every night. This habit increases your risk of developing tooth decay, cavity formation, inflamed gums, and painful mouth sores.
3. Saves You Money
Replacing a broken or damaged retainer can cost anywhere from $150 to $600 depending on the type and your orthodontist. Mineral buildup makes plastic retainers brittle, making them crack or warp much faster. Proper maintenance extends the lifespan of your device significantly.
4. Keeps Clear Retainers Invisible
Clear plastic retainers look great because they are almost invisible. However, yellow tartar stains and cloudy bacterial films make them look dirty and noticeable. Regular maintenance preserves transparency so you can smile confidently.
How to Clean Retainers: Step-by-Step Daily Routines
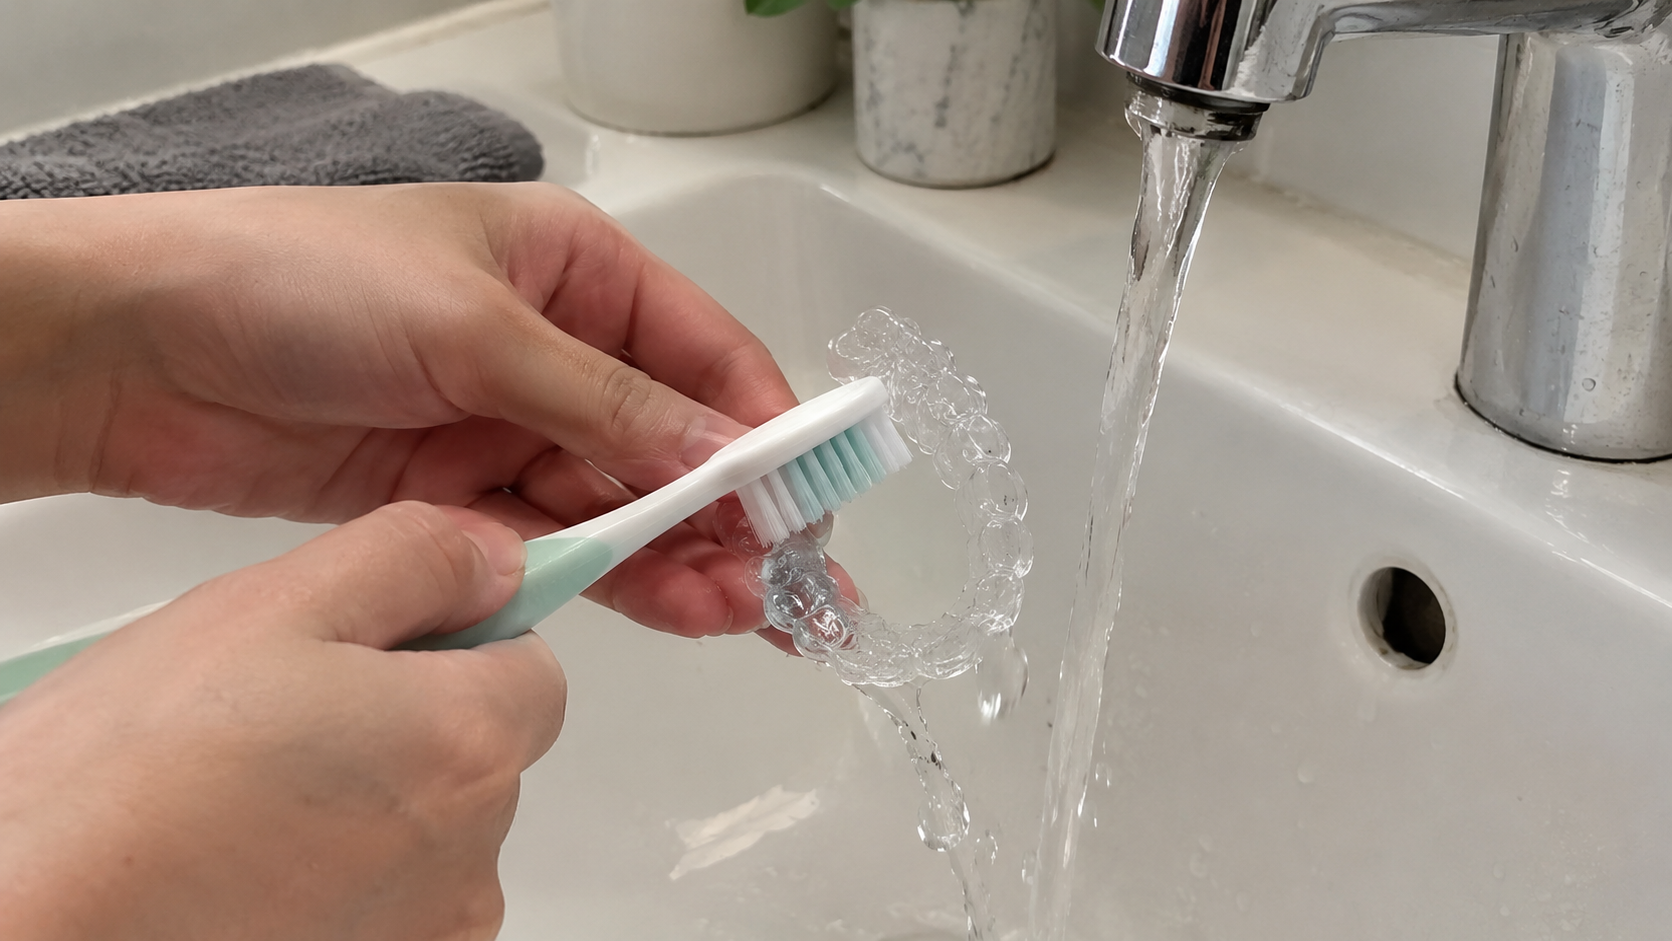
Cleaning your retainer does not need to take hours. Establishing a quick morning and evening routine takes less than 2 minutes and keeps your device in top condition.
Step 1: Rinse Immediately Upon Removal
Whenever you take your retainer out of your mouth, rinse it right away with lukewarm water. Do not let saliva dry on the surface. Dry saliva creates a sticky foundation for bacteria and minerals to settle into.
Step 2: Brush Lightly with Soft Bristles
Use a dedicated soft-bristled toothbrush to clean your retainer gently. Avoid using the same toothbrush you use for your teeth, as toothpaste residue can transfer back and forth.
-
Rinse the retainer with lukewarm water.
-
Gently brush all inner and outer surfaces in small, circular motions.
-
Clean every tiny groove, crevice, and metal loop carefully.
-
Rinse thoroughly under running water.
Step 3: Use Mild Liquid Dish Soap or Castile Soap
Regular toothpaste contains tiny abrasive particles designed to scrub tooth enamel. These abrasive particles create microscopic scratches on plastic retainers. Bacteria hide inside these tiny scratches, making the retainer harder to clean over time and giving it a cloudy appearance.
Instead of toothpaste, use a drop of mild liquid dish soap or unscented liquid castile soap. Soap dissolves oils and kills bacteria without scratching the delicate plastic surface.
Step 4: Air-Dry and Store Correctly
After cleaning, pat your retainer dry with a clean paper towel or let it air-dry completely on a clean cloth. Never place a wet retainer inside a closed plastic case, as dark and damp environments are breeding grounds for mold and mildew. Always leave your storage case slightly open until the retainer is completely dry.
How to Deep Clean Retainers: Removing Stubborn Stains and Tartar
Daily rinsing and light brushing keep fresh bacteria at bay, but stubborn mineral spots or yellowing require a deeper clean once or twice a week.
Method 1: Specialized Retainer Cleaning Tablets
Specialized cleaning tablets are the safest, easiest option for clear and acrylic retainers.
-
Fill a glass or small bowl with lukewarm water.
-
Drop 1 cleaning tablet into the water and wait for it to start bubbling.
-
Submerge your retainer completely in the solution.
-
Let it soak for 15 to 20 minutes (follow package directions).
-
Remove the retainer and brush it gently with a soft toothbrush to lift loosened debris.
-
Rinse thoroughly with cool running water before putting it back in your mouth.
Method 2: The Vinegar and Water Soak
White distilled vinegar is a natural, budget-friendly acid that dissolves hard calcium buildup and tartar without damaging plastic.
-
Mix equal parts white distilled vinegar and lukewarm water in a glass (for example, 0.5 cup vinegar and 0.5 cup water).
-
Submerge your retainer in the mixture.
-
Allow it to soak for 15 to 30 minutes.
-
Take the retainer out and scrub it gently with a soft brush to remove loosened white buildup.
-
Rinse very well with running water to eliminate any leftover vinegar smell or taste.
Method 3: Baking Soda Paste
Baking soda naturally neutralizes acids, removes stubborn odors, and breaks down plaque without scratching plastic surfaces.
-
Mix 1 tablespoon of baking soda with just enough water to form a smooth paste.
-
Apply the paste to your retainer using a soft toothbrush.
-
Scrub all surfaces gently for 1 to 2 minutes.
-
Rinse thoroughly with lukewarm water until no grit remains.
Real-Life Example: Bella’s Retainer Transformation
To see how simple habits make a massive difference, let us look at Bella’s story.
Bella finished her orthodontic treatment 2 years ago. She loved her straight teeth and wore her clear plastic retainer every night without fail. However, after 6 months, she noticed her retainer was turning cloudy, yellowish, and developed an unpleasant odor every morning.
Thinking she needed to sanitize it thoroughly, Bella placed her retainer in a mug of boiling water. Within 30 seconds, the heat melted and warped the plastic tray. It no longer fit her teeth, forcing her to pay $250 for a brand-new replacement.
Determined not to repeat her mistake, Bella changed her approach with her new retainer:
-
She placed a bottle of unscented liquid castile soap and a soft toothbrush next to her bathroom sink.
-
Every morning, she rinsed her retainer immediately after taking it out and brushed it gently with soap.
-
Once a week, she soaked her retainer in a vinegar-and-water solution for 20 minutes to prevent white mineral spots.
By making these small adjustments, Bella kept her replacement retainer completely clear, fresh, and odor-free for over 3 years without spending extra money.
7 Major Mistakes to Avoid When Cleaning Retainers
Avoiding damaging habits is just as important as knowing how to clean retainers correctly. Here are 7 common mistakes that ruin retainers:
1. Using Hot or Boiling Water
Plastic retainers are heat-sensitive. Hot or boiling water melts, twists, and warps the plastic instantly. Once warped, your retainer will no longer fit your teeth properly and can push your teeth out of alignment. Always use lukewarm or cool water.
2. Scrubbing with Regular Toothpaste
Toothpaste is designed for hard tooth enamel, not soft plastic. Abrasive ingredients in regular toothpaste scratch plastic surfaces, creating microscopic grooves that trap bacteria, yellow stains, and odors.
3. Bleaching Your Retainer
Household bleach chemically degrades plastic and acrylic, turning clear trays yellow, weakening metal wires, and releasing dangerous toxic chemicals into your mouth. Never use bleach on any dental appliance.
4. Soaking Hawley Retainers in Mouthwash
Alcohol-based mouthwashes dry out acrylic material over time, making it brittle and prone to cracking. Additionally, artificial dyes in blue or green mouthwash can permanently stain clear plastic and pink acrylic parts.
5. Running Retainers Through the Dishwasher
Dishwashers combine extreme heat, harsh detergents, and violent high-pressure water jets. Putting your retainer in a dishwasher will warp or destroy it completely in a single cycle.
6. Wrapping Retainers in Paper Towels
Wrapping a retainer in a napkin or paper towel while eating at a restaurant or school cafeteria is the single most common way retainers get accidentally thrown in the trash. Always place your retainer directly into its protective hard case when it is not in your mouth.
7. Neglecting the Retainer Storage Case
Placing a clean retainer inside a dirty storage case instantly recontaminates it with old bacteria, dust, and mold. Wash your plastic retainer case with warm water and soap at least twice a week, and let it dry completely.
Cleaning Special Types of Retainers
Different retainers require slightly different care techniques. Here is how to look after each specific style safely.
| Retainer Type | Best Daily Cleaning Agent | Deep Cleaning Method |
| Clear Plastic (Essix) | Mild dish soap & lukewarm water | Retainer tablets or baking soda |
| Hawley (Acrylic & Wire) | Liquid soap & soft brush | Equal parts water & white vinegar |
| Permanent (Bonded Wire) | Floss threaders & interdental | Professional dental cleaning |
Clear Plastic Retainers (Essix or Vivera)
Clear retainers are comfortable and invisible, but they trap moisture tightly against your teeth. Clean them every morning using liquid dish soap and lukewarm water. Avoid colored soaps, hard-bristled brushes, or alcohol-based rinses.
Hawley Retainers (Acrylic and Metal)
Hawley retainers feature a durable acrylic base and metal wires. You can clean them with a soft brush and mild soap. When deep cleaning, do not leave metal wires soaked in acidic solutions like vinegar for longer than 20 minutes, as acid can weaken metal solder over time.
Permanent or Bonded Retainers
Permanent retainers consist of a custom metal wire glued behind your lower or upper front teeth. Because you cannot remove this wire, cleaning requires extra care around your gums:
-
Use Floss Threaders or Superfloss: Thread the floss under the wire between each pair of teeth daily to clear out trapped food particles and plaque.
-
Try Interdental Brushes: Tiny tree-shaped brushes fit easily under the wire to clean tight spaces.
-
Use a Water Flosser: A high-pressure stream of water removes food debris and massages gum tissue along the bonded wire quickly and comfortably.
How to Remove Tough Yellow Stains and Hardened Tartar
If your retainer already has hard white spots or yellow stains, simple rinsing will not remove them. Hardened spots are mineralized plaque that requires safe chemical breakdown.
Step-by-Step Tartar Removal Method
-
Prepare a Vinegar Soak: Mix 1 part white distilled vinegar with 1 part lukewarm water in a small clean container.
-
Soak the Retainer: Place your retainer in the mixture for 30 minutes. The acetic acid in vinegar gently breaks down hard calcium deposits.
-
Scrub Gently: Take the retainer out and scrub the white spots with a soft-bristled toothbrush. The softened mineral deposits should flake off easily.
-
Use Baking Soda for Tough Spots: If yellow stains remain, make a thick paste with baking soda and water. Scrub the stained areas gently for 2 minutes.
-
Rinse and Sanitize: Wash the retainer thoroughly with cool water and dish soap to remove all traces of vinegar taste and baking soda grit.
Essential Retainer Hygiene Habits for Travel and On-the-Go
Maintaining a clean retainer while traveling, working, or attending school requires a bit of planning.
Keep a Portable Cleaning Kit
Pack a small travel pouch in your bag or backpack containing:
-
A compact hard retainer case with air ventilation holes.
-
A travel-sized soft toothbrush.
-
A small bottle of liquid soap or a few individually wrapped retainer cleaning wipes.
-
A small pack of floss threaders if you wear a permanent bonded retainer.
What to Do When You Cannot Clean Immediately
If you remove your retainer while eating out and do not have access to soap or a brush:
-
Rinse the retainer thoroughly under a public bathroom faucet using lukewarm tap water.
-
If no sink is available, rinse it with fresh drinking water from your bottle.
-
Shake off excess moisture and place it immediately inside your protective case.
-
Clean it thoroughly with soap as soon as you get home.
How to Protect Your Teeth While Wearing a Retainer
Keeping your retainer clean is only half the battle. You must also prepare your teeth before putting your retainer in place every night.
Brush and Floss Before Wearing Your Retainer
Never place a retainer over unbrushed teeth. Trapping food debris, sugar, and bacteria underneath a plastic tray overnight creates a perfect environment for tooth decay. Always brush for 2 full minutes and floss thoroughly before inserting your retainer.
Drink Only Pure Water
Remove clear retainers whenever you drink anything other than plain, unflavored water. Drinking coffee, tea, soda, juice, or flavored water while wearing clear retainers traps sugar and acids inside the trays, leading to rapid tooth decay and permanent plastic staining.
Keep Up with Regular Dental Checkups
Visit your general dentist every 6 months for professional cleanings and checkups. Your dentist can inspect your retainer for cracks, test its fit, and remove hardened tartar that you cannot eliminate at home.
When to Seek Help from an Expert
Even with great care, retainers do not last forever. Knowing when to consult your orthodontist or dentist saves your teeth from unwanted shifting and prevents oral health issues.
Signs You Need a Replacement Retainer
-
Cracks or Fractures: Visible cracks trap bacteria and weaken structural support.
-
Warped or Loose Fit: If the retainer feels loose or pops off easily, it is no longer holding your teeth in place.
-
Tight or Painful Fit: If putting your retainer on feels painful after regular wear, your teeth may have shifted.
-
Persistent Odor or Discoloration: If deep soaking methods no longer remove bad odors or cloudy stains, the plastic may have degraded permanently.
If you notice any of these signs, bring your current retainer to an orthodontist or dental specialist. They can examine your device, adjust bonded wires, or create a fresh, perfectly fitted replacement using modern 3D digital scans.
Future Trends in Dental Retainers and Appliance Care
Dental technology is advancing rapidly, making post-treatment maintenance easier, safer, and more convenient than ever before.
3D Printed Custom Retainers
Traditional retainer creation required messy putty impressions. Modern clinics use digital intraoral scanners to create precise 3D digital models of your teeth in seconds. These models are sent to high-precision 3D printers that craft perfect-fitting clear retainers using durable, stain-resistant materials.
Ultrasonic Cleaning Devices
Compact home ultrasonic cleaner pods are becoming popular for cleaning dental appliances. These small devices use high-frequency sound waves transmitted through water to create millions of microscopic cavitation bubbles. These bubbles dislodge bacteria, plaque, and stubborn stains from hard-to-reach crevices without scratching delicate plastic surfaces.
Anti-Microbial Materials
Researchers are developing advanced smart polymers infused with microscopic silver ions and antimicrobial agents. Future retainers will actively repel bacteria and prevent plaque buildup on their own, reducing bad smells and stains automatically.
Practical FAQs on How to Clean Retainers
How often should I clean my retainer?
You should rinse and brush your retainer gently every single time you take it out of your mouth. Give it a deeper soak in specialized cleaning solution or diluted white vinegar 1 to 2 times per week.
Can I clean my retainer with hydrogen peroxide?
Yes, you can mix equal parts 3% hydrogen peroxide and lukewarm water to soak your retainer for 15 minutes. Hydrogen peroxide kills bacteria and neutralizes odors effectively, but rinse the retainer thoroughly with running water before putting it back in your mouth.
Why does my clear retainer still smell after cleaning?
Persistent odors mean bacteria have settled deep into microscopic scratches on the surface, usually caused by scrubbing with harsh toothpaste or hard-bristled brushes. Try soaking it in baking soda paste or a specialized cleaning tablet. If the odor remains, it may be time to get a replacement retainer.
Can I soak my retainer overnight?
It depends on the type of retainer and solution. Plain water or specific overnight cleaning solutions are fine for clear retainers. However, never leave retainers soaking in acidic solutions like vinegar or alcohol rinses overnight, as prolonged exposure weakens the materials.
Is it okay to use mouthwash to soak clear retainers?
Occasional soaking in alcohol-free mouthwash diluted with water for 5 to 10 minutes is acceptable. Avoid alcohol-based mouthwashes or dark blue and green dyes, as they dry out plastic and cause permanent discoloration.
How long do retainers usually last?
Clear plastic retainers generally last 1 to 3 years depending on wear and care habits. Traditional Hawley retainers made of acrylic and metal wires can last 5 to 10 years or longer with proper maintenance.
Final Thoughts on Retainer Care
Taking care of your retainer is essential for protecting your healthy, beautiful smile. By establishing a quick daily cleaning habit using mild soap, lukewarm water, and soft brushing, you keep your retainer clear, fresh, and completely odor-free. Avoid harsh toothpaste, hot water, and aggressive chemicals to protect your investment for years to come.
Keep your protective hard case nearby, stick to a simple daily hygiene routine, and do not hesitate to contact your orthodontist whenever you notice damage or changes in fit.