 Harriet Wetton
Crocheting in the round opens up a whole new world of crafting. Whether you want to make cozy hats, cute plushies, circular rugs, or colorful coasters, mastering the basic crochet circle is your very first step. Yet, for many beginners, making a flat, smooth circle feels almost impossible.
Have you ever tried crocheting a circle, only to watch it curl up into a bowl? Or maybe your circle turned into a wavy mess that looks more like a potato chip? You might even end up with a weird hexagon instead of a smooth, round curve.
It can be deeply frustrating when you follow a pattern step by step, only to end up with a project that will not lie flat. You start to wonder if your tension is wrong, if your hook is the wrong size, or if you simply do not have the natural talent for crafting.
Take a deep breath and relax. You are not bad at crocheting. Wavy edges and curling bowls happen to every single person who picks up a yarn needle.
Making a flat circle is not about luck. It comes down to basic math and a simple formula that anyone can learn, following standard sizing guidelines established by organizations like the Craft Yarn Council.
In this comprehensive article by WillingToDo, we will break down the exact process of crocheting a flat circle. You will learn how the basic math works, how to start your center, how to fix annoying bumps, and how to adapt your stitches for any project.
By the end of this article, you will feel confident enough to pick up your hook and create flawless circular projects every single time. Let’s Learn How to crochet a circle.
What Is a Crochet Circle and Why Does It Matter?
A crochet circle is a piece of fabric created by working stitches in continuous or joined rounds, moving outward from a central point. Unlike traditional flat crochet, where you work back and forth in rows, working in the round allows you to create seamless circular shapes.
Understanding how to make a proper circle matters because it forms the core foundation of hundreds of patterns.
If you want to make a beanie, you usually start at the crown with a flat circle before working down the sides. If you want to make a stuffed animal, you start with a small circle to form the head or body.
When your foundational circle is uneven, every step that follows becomes harder. An uneven base can make a hat fit weirdly or make a coaster wobble on your coffee table. Once you learn the rhythm of increases, working in the round becomes simple and relaxing.
| Round Number | Stitch Sequence | Total Stitch Count |
| Round 1 | 6 Single Crochets into Magic Ring | 6 stitches |
| Round 2 | Increase in every stitch around | 12 stitches |
| Round 3 | Repeat [1 single crochet, 1 increase] around | 18 stitches |
The Secret Math Behind a Perfectly Flat Circle
The key to keeping a crochet circle completely flat comes down to a predictable mathematical increase rule. Every stitch height requires a specific number of stitches in your very first round, as well as a consistent number of increases in every round after that.
If you add too few stitches in a round, your circle will pull inward and form a bowl. If you add too many stitches, your fabric will ruffle up because there is too much extra material for the space available.
Here is the simple rule for starting stitch counts based on your chosen stitch height:
-
Single Crochet (sc): Start with 6 to 8 stitches in Round 1. Increase by 6 to 8 stitches in every new round.
-
Half Double Crochet (hdc): Start with 8 to 10 stitches in Round 1. Increase by 8 to 10 stitches in every new round.
-
Double Crochet (dc): Start with 12 stitches in Round 1. Increase by 12 stitches in every new round.
The Universal Increase Formula
No matter which stitch you choose, the pattern of increases follows the exact same growth schedule:
-
Round 1: Work your base number of stitches into the center ring.
-
Round 2: Work 2 stitches into every stitch around. (You double your total stitch count).
-
Round 3: Work [1 single stitch, then 1 increase] all the way around.
-
Round 4: Work [2 single stitches, then 1 increase] all the way around.
-
Round 5: Work [3 single stitches, then 1 increase] all the way around.
Notice the pattern? The number of single stitches between each increase goes up by 1 in every round.
Tools and Materials You Need
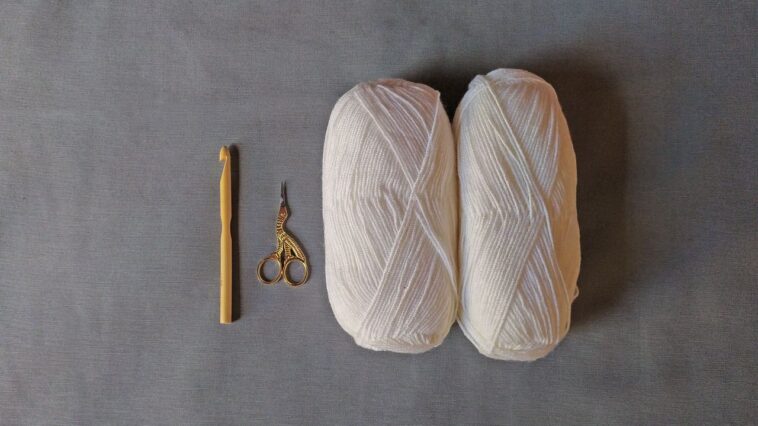
Before starting your project, gather these simple supplies:
-
Yarn: Choose a smooth, light-colored medium weight (Worsted Weight or #4) yarn. Light colors make it much easier to see where your stitches go. Avoid fuzzy or textured yarn while learning.
-
Crochet Hook: Match your hook size to your yarn label. For worsted weight yarn, a 5.0 mm (H-8) or 5.5 mm (I-9) hook works best.
-
Stitch Markers: These are essential for keeping track of the start of each round. A locking plastic marker or a small safety pin works great.
-
Tapestry Needle: Used for weaving in loose yarn ends when you finish.
-
Scissors: A small pair of sharp scissors for cutting your yarn.
Step-by-Step Guide: Crocheting a Flat Single Crochet Circle
Let us walk through making a flat single crochet circle step by step. Grab your yarn and hook, and follow along.
Step 1: Start Your Center
There are 3 popular ways to start a circle:
-
Method A: The Magic Ring (Recommended). Wrap the yarn around your fingers to form a loop. Insert your hook, yarn over, and pull up a loop. Chain 1 to secure. This method allows you to pull the yarn tail tightly, closing the center hole completely.
-
Method B: Chain 2 Method. Chain 2 stitches. Work all of your Round 1 single crochet stitches directly into the 2nd chain from your hook.
-
Method C: Chain Loop Method. Chain 4 stitches. Insert your hook into the 1st chain and work a slip stitch to form a ring. Work your Round 1 stitches directly into the center of that ring.
Step 2: Complete Round 1
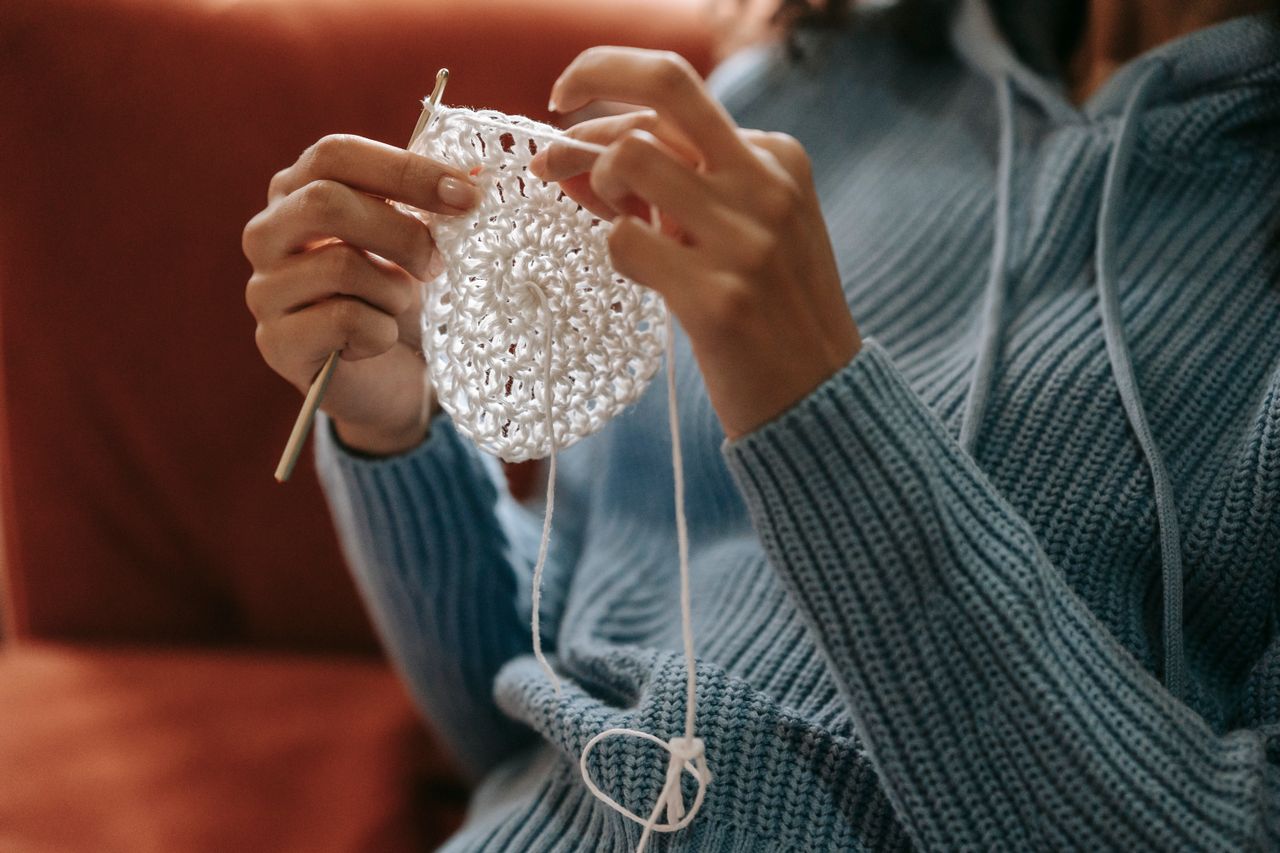
For this tutorial, we will use a base count of 6 single crochets using a Magic Ring.
-
Work 6 single crochet stitches into your ring.
-
Pull the short yarn tail tightly to close the center hole.
-
Place a stitch marker into the 6th stitch you just made.
Total Stitches: 6
| Magic Ring Stage | Action Required | Resulting State |
| Stage 1 | Form an open yarn loop around fingers | Open Loop |
| Stage 2 | Work 6 single crochets directly into loop | Stitches Placed |
| Stage 3 | Pull short yarn tail firmly | Closed Center Ring |
Step 3: Complete Round 2
We will now double our stitches by making an increase (2 stitches in the same space) into every stitch.
-
Insert your hook under both loops of the first stitch from Round 1.
-
Work 2 single crochets into that same stitch.
-
Repeat this process for all 6 stitches around.
-
Move your stitch marker to the very last stitch of this round.
Total Stitches: 12
Step 4: Complete Round 3
Now we alternate between single stitches and increases.
-
Work 1 single crochet into the first stitch.
-
Work 2 single crochets into the next stitch.
-
Repeat this pattern
[1 sc, 1 inc]6 times around. -
Move your stitch marker to the last stitch.
Total Stitches: 18
Step 5: Complete Round 4
-
Work 1 single crochet into each of the next 2 stitches.
-
Work 2 single crochets into the 3rd stitch.
-
Repeat this pattern
[2 sc, 1 inc]6 times around. -
Move your stitch marker to the last stitch.
Total Stitches: 24
Step 6: Complete Round 5
-
Work 1 single crochet into each of the next 3 stitches.
-
Work 2 single crochets into the 4th stitch.
-
Repeat this pattern
[3 sc, 1 inc]6 times around. -
Move your stitch marker to the last stitch.
Total Stitches: 30
Real Life Example: Making a Quick Cotton Coaster
To see how this works in a real project, let us look at a simple cotton drink coaster.
Sarah wanted to make a set of round coasters for her coffee table. She bought a ball of cotton yarn and a 5.0 mm hook.
On her first try, she forgot to count her stitches and ended up with 22 stitches in Round 3 instead of 18. Her coaster curled up like a small bowl, making her coffee cup slide right off.
She unravelled her yarn, grabbing a stitch marker to keep track. She reset her project using the exact math steps:
-
Round 1: 6 sc into a Magic Ring (6 sts)
-
Round 2: 2 sc in each stitch around (12 sts)
-
Round 3: [1 sc, 1 inc] repeat around (18 sts)
-
Round 4: [2 sc, 1 inc] repeat around (24 sts)
-
Round 5: [3 sc, 1 inc] repeat around (30 sts)
-
Round 6: [4 sc, 1 inc] repeat around (36 sts)
-
Round 7: [5 sc, 1 inc] repeat around (42 sts)
After Round 7, she fastened off her yarn and wove in the tail. The result was a completely flat, perfectly round 4-inch coaster. Her coffee cup sat flat without wobbling.
Common Circle Problems and How to Fix Them
Even experienced crafters run into issues when crocheting in the round. Here is how to diagnose and fix the most common problems.
| Common Issue | Underlying Cause | Practical Solution |
| Curling into a Bowl | Tension is too tight, or too few starting stitches/increases | Add more starting stitches or switch to a larger hook |
| Wavy or Ruffling Edges | Too many stitches added in recent rounds | Decrease increases or double-check stitch counting |
| Hexagon Shape | Increase stitches stacking directly on top of each other | Stagger increase points on even-numbered rounds |
1. Why Is My Circle Curling Into a Bowl?
If your piece turns into a cup or bowl shape, it means your edges are too tight and there are not enough stitches to allow the piece to spread outward.
-
Cause A: You missed increases or miscounted your stitches in recent rounds.
-
Cause B: Your starting stitch count was too low (e.g., using only 4 stitches for a single crochet ring).
-
Cause C: Your yarn tension is too tight.
-
Fix: Unravel back to where the bowl shape started. Double-check your increase count. If your tension is naturally tight, switch to a hook size that is 0.5 mm larger.
2. Why Is My Circle Wavy or Ruffling?
If your circle looks like a ruffled pie crust, you have too many stitches around the outer ring.
-
Cause A: You accidentally added extra increases.
-
Cause B: Your starting stitch count was too high (e.g., using 12 single crochets in Round 1 instead of 6 to 8).
-
Fix: Check your math for the current round. If you have too many stitches, unravel the round and repeat it with the correct number of increases.
3. Why Does My Circle Look Like a Hexagon?
If your circle has visible corners and looks more like a 6-sided polygon than a soft curve, your increases are stacking directly on top of each other.
-
Cause: When you follow standard instructions, you place the increase stitch in the exact same spot for every single round. This creates distinct points.
-
Fix: Stagger your increases on even-numbered rounds. (See advanced strategies below).
Continuous Rounds vs. Joined Rounds
When crocheting in the round, you must choose between two main construction methods. Each approach has pros and cons depending on what you are making.
| Feature | Continuous Rounds (Spiral) | Joined Rounds |
| How It Works | You keep stitching directly into the next stitch without stopping. | You join the last stitch to the first stitch using a slip stitch, then chain to start the next round. |
| Visible Seam | None. Completely seamless. | Creates a thin, vertical seam down the side of your work. |
| Color Changes | Leaves a small step or jog when changing colors. | Creates clean, crisp color shifts. |
| Best Used For | Amigurumi, plush toys, seamless hats, simple coasters. | Striped blankets, mandala patterns, garments, textured bags. |
| Stitch Marker Needed? | Absolutely required to track the start of every round. | Optional, but still helpful for beginners. |
Advanced Strategies for Perfect Circles
Once you master the basic increase rules, use these advanced techniques to make your projects look clean and professional.
1. Staggering Increases to Prevent Hexagons
When making larger circles, stacking your increases creates sharp corners. To fix this, stagger your increase points on every even-numbered round by splitting the initial single stitches in half.
Here is how a staggered single crochet schedule looks:
-
Round 1: 6 sc in Magic Ring (6 sts)
-
Round 2: Inc in each st around (12 sts)
-
Round 3: [1 sc, 1 inc] 6 times (18 sts)
-
Round 4 (Staggered): 1 sc, 1 inc, then [2 sc, 1 inc] 5 times, finish with 1 sc (24 sts)
-
Round 5 (Normal): [3 sc, 1 inc] 6 times (30 sts)
-
Round 6 (Staggered): 2 sc, 1 inc, then [4 sc, 1 inc] 5 times, finish with 2 sc (36 sts)
By shifting where the increases happen, your work stays completely round instead of forming flat sides.
2. Matching Stitch Heights to Initial Counts
Remember to adjust your starting stitch count whenever you change stitch types:
-
Single Crochet (sc): Short stitch → needs 6 to 8 initial stitches.
-
Half Double Crochet (hdc): Medium stitch → needs 8 to 10 initial stitches.
-
Double Crochet (dc): Tall stitch → needs 12 initial stitches.
-
Treble Crochet (tr): Very tall stitch → needs 18 to 20 initial stitches.
If you start a Double Crochet circle with only 6 stitches, the tall height of the stitches will immediately pull the fabric into a cone shape. Always match your starting count to your stitch height.
Seamless Color Changes in the Round
Changing yarn colors while making circles allows you to craft vibrant mandala designs, sunbursts, or striped pot holders.
-
Work your last stitch before the color change until you have 2 loops left on your hook.
-
Drop your current yarn color.
-
Grab your new yarn color and pull it through the remaining 2 loops to finish the stitch.
-
Continue into the next stitch using the new color.
If you are working in joined rounds, make this color switch during the final slip stitch that connects your round. This keeps your color lines sharp and prevents strange jagged steps.
Related Subtopics to Explore Next
Mastering the basic flat circle opens up several exciting projects and techniques. Once you feel comfortable with this article, you can branch out into these popular related topics:
-
The Magic Ring Technique: A detailed focus on mastering the magic loop so your centers never loosen or unravel.
-
How to Crochet Amigurumi for Beginners: Learn how changing your circle into a 3D sphere allows you to craft cute plush animals and toys.
-
How to Crochet a Classic Granny Square: Explore how turning stitches into corners lets you shift from circular bases into square motifs.
-
How to Read Crochet Patterns and Charts: Learn how to read written abbreviations and visual symbol diagrams effortlessly.
-
How to Block Crochet Projects: Discover how steam and water blocking can smooth out minor tension flaws in your flat circles.
When to Seek Extra Guidance
Learning a new handcraft takes time, patience, and practice. While this article covers all the essentials, you might still run into tricky situations where extra help is useful.
You might want to join a local crafting group or consult a veteran stitcher if:
-
You have adjusted your stitch count multiple times and your yarn still curls or ruffles.
-
You experience hand pain, wrist fatigue, or strain while holding your hook.
-
You are attempting a complex visual chart or an advanced mandala pattern that uses unusual specialty stitches.
Reaching out to local craft shops or online communities can help you get quick, personalized feedback on your technique.
Future Trends in the Craft World
Crocheting in the round continues to evolve as new styles and materials emerge:
-
Eco-Friendly Yarns: More crafters are using recycled cotton, hemp, and linen yarns to make sustainable market bags, dishcloths, and home decor circles.
-
Modern Chunky Home Goods: Jumbo yarn weight circles are trending for modern interior design. Crafters use thick wool or tube yarn to create massive, soft floor cushions and thick pet beds in under an hour.
-
Digital Pattern Apps and Counters: Modern pattern apps make tracking your circular increases effortless, automatically reminding you when to stagger stitches so you do not have to count manually.
Conclusion
Learning how to crochet a flat circle is a rewarding milestone for any crafter. While curling edges or odd hexagon shapes can feel frustrating at first, remember that it all comes down to simple math and tension control.
Always match your starting stitch count to your stitch height, place a stitch marker at the start of every round, and do not be afraid to unravel a round if your count gets off track. Every mistake is just a stepping stone toward building muscle memory.
Pick up your favorite hook, choose a bright yarn, and practice making a simple 5-round circle today. Once you get the rhythm down, you will be ready to tackle hats, plush toys, and stunning home decor projects with complete confidence.
Frequently Asked Questions
Q1: Why does my magic ring keep coming unraveled?
Your magic ring came undone because the initial tail was not secured properly. After working Round 1, pull the tail tight, then make sure to weave the yarn tail in back and forth through the stitches using a tapestry needle. Do not just cut it off short.
Q2: Can I fix a slightly curling circle without unraveling it?
Yes. If the curling is minor, you can often flatten it out by blocking. Wet your finished cotton or wool piece, flatten it out on a foam mat, pin it into a true circle shape, and let it air dry completely.
Q3: Does the turning chain count as a stitch in circular crochet?
It depends on the pattern instructions. Generally, in single crochet, the chain-1 turning chain does not count as a stitch. In double crochet, the chain-3 turning chain usually does count as the very first stitch of the round.
Q4: How do I know which hook size to use for my circle?
Check the paper band wrapped around your yarn skein. It displays a recommended hook size in millimeters. If your circles always turn out too tight and curl up, move up to a larger hook size.
Q5: Why is there a hole in the center of my crochet circle?
A center hole happens if you start your circle using the Chain 4 loop method instead of a Magic Ring. To eliminate the hole completely, switch to using a Magic Ring so you can pull the center ring shut.
Q6: How many stitches should I start with for a half double crochet circle?
You should start with 8 to 10 stitches in Round 1 for a half double crochet circle. Then, increase by that same number (8 to 10 stitches) in every round that follows.