 Harriet Wetton
You pull out of your driveway, excited for a morning ride, only to feel your electric bike bog down the moment you hit a slight incline. Your battery bar drops two ticks instantly, and the motor groans as cars pass you by. It is frustrating, exhausting, and completely ruins the feeling of independence an e-bike is supposed to give you.
Many e-bike owners face this exact problem. Most standard e-bikes look great on paper, but in the real world, they suffer from short range, sluggish hill-climbing power, and stiff suspensions that send every pothole right up your spine.
If you have been searching for a machine that solves these issues once and for all, the Wire Freedom e bike (often referred to in the riding community as the Wired Freedom) has likely caught your attention.
Packing a massive 60-volt system, dual high-capacity batteries, and full air suspension, it promises to bridge the gap between a bicycle and a light motorcycle.
In this ultimate guide, we will break down everything you need to know about the Wire Freedom e bike. We will explore its raw power, examine its real-world battery performance, guide you through setting it up step by step, and reveal how to avoid common owner mistakes.
Foundational Explanation: What Is the Wire Freedom E Bike?
The Wire Freedom e bike is a high-performance electric fat-tire bike engineered specifically for riders who want speed, long-range capabilities, and total terrain flexibility. Unlike traditional commuter e-bikes that rely on modest 36V or 48V setups, the Wire Freedom is built around a heavy-duty 60V architecture.
Why the 60V Architecture Matters
Voltage in an e-bike is directly tied to top-end speed and motor efficiency. A higher voltage system allows the motor to run cooler while producing far more power.
While typical commuter e-bikes cap out at 750 watts, the Wire Freedom features a 1,500-watt continuous hub motor capable of peaking at an incredible 3,200 watts of power.
Paired with a 45-amp controller, this machine generates up to 153 Nm of torque, allowing it to flatten steep 15% inclines without missing a beat.
Architecture Comparison
| System Type | Battery Voltage | Continuous Motor Power | Typical Speed & Performance |
| Standard E-Bike Architecture | 48V Single Battery | 750W | Moderate Speed & Standard Range |
| Wire Freedom Architecture | 60V Dual Battery | 1500W Continuous (3200W Peak) | High Speed & Extended Dual Range |
Key Specifications Overview
| Specification | Technical Detail | Real-World Benefit |
| Motor Output | 1500W Continuous / 3200W Peak | Effortless hill climbing and fast acceleration. |
| Battery System | Dual 60V (20Ah main + 15Ah rear = 35Ah total) | Massive 2,100Wh capacity eliminates range anxiety. |
| Top Speed | 20 mph (Class 2) / 35+ mph (Unlocked) | Keeps pace with city traffic easily when off-road. |
| Brakes | 4-Piston Hydraulic with 203mm Rotors | Reliable, heavy-duty stopping power at high speeds. |
| Suspension | Front RST Air Fork + Rear DNM Air Shock | Smooths out severe bumps, gravel, and rough pavement. |
| Tires | 26 x 4.0-inch All-Terrain Fat Tires | Exceptional grip on pavement, sand, and mud. |
How the Wire Freedom Works Step-By-Step
Getting the most performance out of a high-powered electric bike requires understanding how its components interact. Here is how to unbox, set up, and configure your Wire Freedom e bike safely.
Step 1: Unboxing and Mechanical Assembly
Because the bike weighs around 115 pounds with both batteries installed, unboxing is easiest with two people.
-
Carefully slice the box edges and lift the heavy frame out.
-
Install the front wheel and secure the heavy-duty thru-axle or quick-release mechanism properly.
-
Attach the wide BMX-style handlebar using the 4-bolt faceplate, ensuring all cables route naturally without tight bends.
-
Mount the pedals (remembering that the left pedal is reverse-threaded).
Step 2: Charging the Dual Battery Setup
The bike features a dual-battery configuration: a 20Ah pack integrated into the main frame down-tube and a 15Ah pack mounted beneath the rear rack.
-
Connect both included 3-amp chargers to separate wall outlets.
-
Plug one charger into the main frame port and the second charger into the rear battery port.
-
Charge both packs until the charger lights turn green (roughly 5 to 6 hours from empty).
Step 3: Setting Sag and Suspension Air Pressure
The full air-suspension system gives you complete control over ride quality.
-
Remove the valve cap on the front RST fork and connect a dedicated shock pump.
-
Pump air according to your weight (typically 80–110 PSI for standard rider weights).
-
Adjust the rear DNM air shock pressure to achieve roughly 20% to 25% sag when sitting still in full gear.
Step 4: Display Calibration and Power Tuning
The digital color display controls the bike’s internal controller settings.
-
Turn on the main display using the power button on the handlebar controls.
-
Enter the settings menu to adjust Pulse Width Modulation (PWM) and cadence sensitivity.
-
Set your preferred Pedal Assist (PAS) power levels (1 through 5) so power delivers smoothly rather than jumping forward unexpectedly.
Real Life Example: Commuting and Trail Riding Comparison
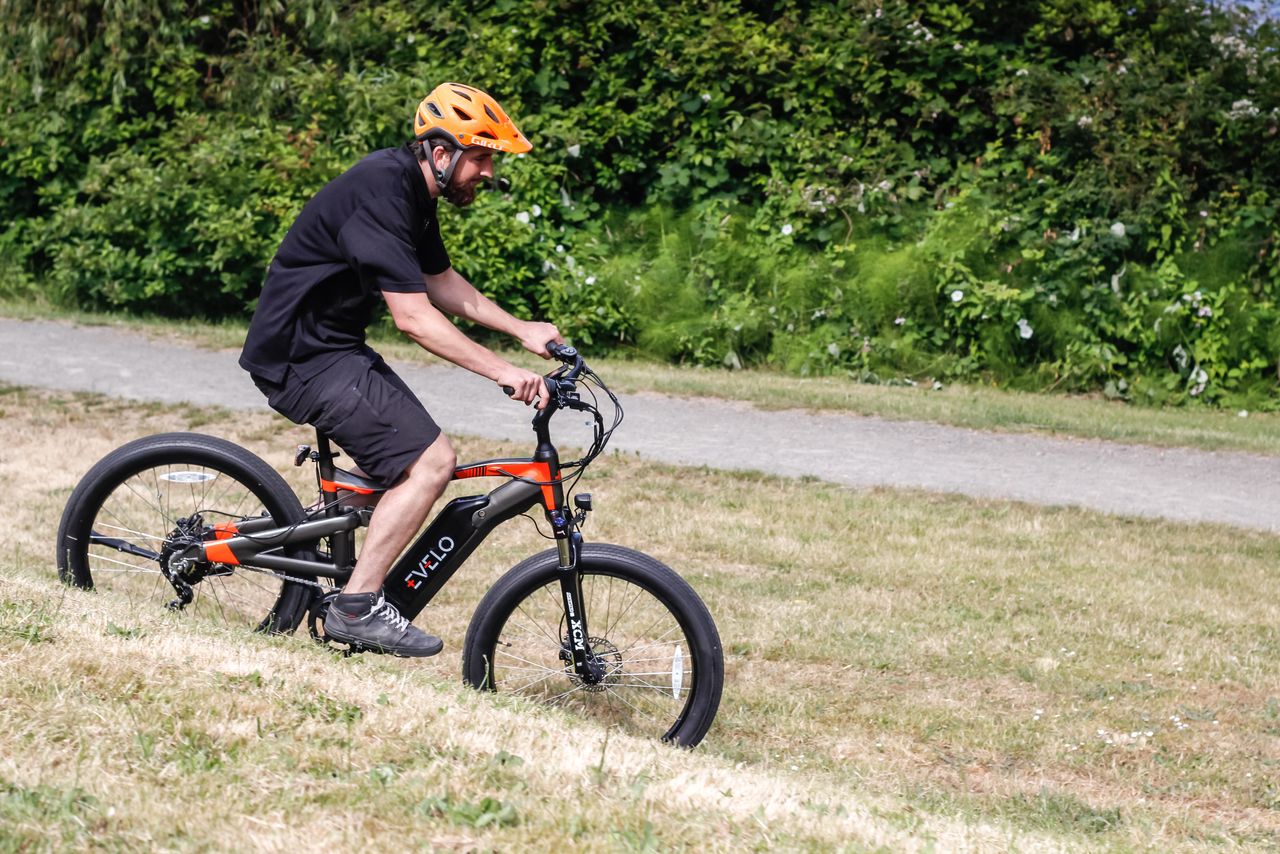
To see how the Wire Freedom handles real-world environments, let us look at how two different riders experience this bike on a daily basis.
Real-World Performance Breakdown
| Route Type | Typical Speed | PAS Level Used | Battery Range Expectation |
| Urban Commute | 22 – 28 mph | PAS 2 – 3 | 50 to 60 Miles Total Range |
| Trail / Hills | 15 – 25 mph | PAS 4 – 5 | 35 to 45 Miles Total Range |
Scenario A: The Daily Heavy Urban Commuter
Dave uses his bike for a 22-mile roundtrip commute across rough city streets, bridge climbs, and paved bike paths.
-
The Challenge: Standard 500W e-bikes struggled on the city bridge incline, dropping his speed to 10 mph and making him feel vulnerable next to traffic.
-
The Wire Freedom Solution: Riding on PAS level 3 with moderate pedaling, Dave maintains a steady 25 mph up the incline without strain. The 4-piston hydraulic brakes allow him to stop instantly when cars pull out suddenly, and the fat tires absorb deep potholes with ease. At the end of his commute, his battery readout still sits above 60%.
Scenario B: Weekend Trail Explorer
Sarah takes her bike out on weekends to ride dirt roads, fire trails, and loose gravel paths.
-
The Challenge: Loose sand and steep dirt hills usually cause narrow-tire e-bikes to slip and lose traction instantly.
-
The Wire Freedom Solution: Lowering her 4.0-inch fat tires to 15 PSI gives her massive traction over sand and loose rocks. The 153 Nm of motor torque pulls her right up steep trail inclines.
Even after 40 miles of aggressive off-road riding using full throttle bursts, the dual 2,100Wh battery bank still has plenty of reserve power left.
For riders who want to explore different fitness options or alternate training methods, checking out dedicated home exercise equipment like the vetra e-bike or indoor solutions like which are the 5 best spin bikes can help maintain high cardio levels during winter months.
Common Mistakes Wire Freedom Owners Make (And How to Avoid Them)
Because the Wire Freedom operates with significantly more power than standard bicycles, new owners frequently make setup and maintenance errors. Avoiding these mistakes will save you money and keep you safe.
1. Neglecting Chain Line and Derailleur Tuning
The massive torque produced by a 3,200W peak motor puts incredible pressure on the rear Shimano 7-speed drivetrain.
-
The Mistake: Shifting gears under full throttle or heavy pedal assist. This often causes the chain to drop or snap.
-
The Fix: Ease off the throttle or pedal pressure for a fraction of a second when shifting gears. Keep your derailleur cable tension properly adjusted.
2. Over-Inflating the Fat Tires
Fat tires behave very differently from narrow road bicycle tires.
-
The Mistake: Inflating the 26×4.0-inch tires to 30+ PSI. This creates a bouncy, harsh ride and drastically reduces tire contact with the road.
-
The Fix: Run pavement tire pressures between 18 and 22 PSI. For off-road trails or sand, lower the pressure to 12–15 PSI for maximum shock absorption and grip.
3. Charging Batteries Inconsistently
With two separate batteries and chargers, power management requires routine.
-
The Mistake: Charging only one battery or letting one pack drain completely down to zero while the other stays full.
-
The Fix: Always charge both batteries fully before long rides. Storing both packs at around 50% capacity if you plan to leave the bike sitting unused for more than two weeks extends their total cell lifespan.
Advanced Strategies: Optimizing Battery Range and High-Speed Stability
Once you master the basics, you can apply a few expert techniques to extract maximum range and peak performance from your machine.
Customizing Power Delivery via Display Settings
The factory settings often deliver power in a aggressive burst as soon as you turn the pedals. You can smooth this out by adjusting the controller parameters:
-
Lower Initial Current: Set the starting power curve to 30% on PAS 1 to eliminate jerky acceleration from a complete stop.
-
Cadence Delay Tuning: Adjust the cadence sensor responsiveness so motor power disengages faster the moment you stop pedaling.
Eliminating High-Speed Handlebar Wobble
Riding any 115-pound bike at speeds exceeding 30 mph requires precise geometry setup.
-
Ensure your front axle nuts or thru-axles are torqued strictly to manufacturer specifications.
-
Check your headset bearings for play by holding the front brake lever and rocking the bike back and forth. Tighten the top stem bolt if you feel any looseness.
-
Balance your tire sealant weight evenly inside the fat tubes to prevent high-speed wheel hop.
Exploring Electric Bike Features and Upgrades
Understanding how your e-bike components function helps you make smart decisions when upgrading or replacing parts down the road.
Smart Battery Care and Maintenance
Your dual 60V Samsung lithium-ion packs represent a significant portion of the bike’s overall value. Protecting these batteries ensures you get 500 to 800 full charge cycles before noticing any capacity drop.
-
Never charge cold batteries immediately after riding in freezing weather; let them reach room temperature first.
-
Keep battery terminal contacts clean and clear of dust or moisture using standard electrical contact cleaner.
Suspension Tuning for Mixed Terrain
Having both a front RST air fork and a rear DNM air shock lets you fine-tune ride dynamics for different surfaces:
-
Pavement Mode: Turn the lockout lever on the rear shock to firm position to prevent pedal bob and save battery energy.
-
Off-Road Mode: Open both front compression dials and decrease rebound dampening slightly to allow the suspension to react quickly over consecutive bumps.
When to Seek Professional E-Bike Maintenance
While standard maintenance like tire inflations and chain cleaning can be done at home, high-powered 60V electric bikes sometimes require professional technician intervention.
Maintenance Responsibility Matrix
| DIY Home Maintenance | Professional Shop Service |
| Tire Pressure & Flat Repairs | Hydraulic Brake Bleeding |
| Chain Cleaning & Lubrication | Electrical Controller Troubleshooting |
| Basic Derailleur Adjustments | Motor Hub Bearing Replacement |
| Air Suspension Pressure Tops | Internal Frame Cable Replacement |
If you experience complex electrical error codes on your screen, controller overheating warnings, or hydraulic line leaks, visiting a certified local e-bike mechanic guarantees the job gets done safely without voiding your warranty.
Future Trends in High-Performance E-Bikes
The e-bike industry is moving forward rapidly. Machines like the Wire Freedom showcase where high-power personal mobility is headed.
-
Higher Voltage Standardization: Expect to see more heavy-duty e-bikes shifting from standard 48V setups to 60V and 72V platforms for better thermal efficiency and cooler motor operations.
-
Dual-Battery Integration: As riders demand true 50+ mile real-world range under heavy motor usage, dual-battery setups will become standard across all-terrain and cargo e-bikes.
-
Advanced Smart Displays: Future revisions will likely include integrated GPS tracking, turn-by-turn navigation, and automated anti-theft motor locks built directly into the display hardware.
Reassuring Conclusion and Next Steps
Upgrading to a high-capacity machine like the Wire Freedom e bike changes how you view local transportation. No longer do steep hills, headwinds, or range anxiety have to dictate where or how far you ride.
By understanding its 60V electrical system, setting up your air suspension properly, and maintaining your drivetrain, you unlock true riding independence.
Your next step is simple: check your tire pressures, set your suspension sag based on your body weight, perform a quick brake check, and hit the road with total confidence!
Frequently Asked Questions
How fast does the Wire Freedom e bike go?
Out of the box, it arrives programmed as a Class 2 e-bike limited to 20 mph. When unlocked for off-road use on private property, its 60V system can reach top speeds of 35 to 40+ mph depending on rider weight and terrain.
What is the real-world battery range?
While maximum estimates cite up to 90 miles on low pedal assist, real-world mixed riding (combining higher speeds, throttle usage, and hilly routes) delivers a reliable 40 to 55 miles per charge from its combined 2,100Wh dual battery system.
How heavy is the Wire Freedom e bike?
The bike weighs approximately 115 pounds with both batteries installed. Removing the dual batteries drops the weight significantly, making it easier to load onto heavy-duty vehicle racks.
How long does it take to charge both batteries completely?
Using the two included 3-amp chargers connected simultaneously to both battery packs, a complete charge from empty takes about 5 to 6 hours.
Can I ride this bike in the rain?
Yes, the bike components, wire quick-connects, and battery seals feature weather-resistant designs suitable for light to moderate rain. Avoid submerging the motor hub or battery casing in deep puddles or spraying them directly with pressure washers.