
 Harriet Wetton

To take a screenshot on a Dell laptop, press the Windows key + Print Screen (PrtScn) together. Your whole screen is saved as a picture in the Screenshots folder inside your Pictures folder. If you want only part of the screen, press Windows key + Shift + S and drag your mouse over the area you want.
In this guide, you will learn all the ways to do it, from the simplest to the more advanced. You will also learn what to do when it does not work, and the mistakes that trip up most people. Take your time. By the end, you will feel fully in control.
What Is a Screenshot and Why Does It Matter?
A screenshot is a picture of whatever is on your screen at that moment. Think of it like taking a photo with a camera, except the camera is your laptop and the subject is your screen.
You might wonder why this matters so much. The truth is, screenshots solve many everyday problems.
- You can show a tech support person exactly what error you see, instead of trying to explain it with words.
- You can save a confirmation page after paying a bill or booking a ticket.
- You can keep a recipe, a map, or a set of directions without printing anything.
- You can share a part of a document with a coworker without sending the whole file.
- You can help a parent or a friend by showing them where to click.
Many people struggle for years with long explanations over the phone. “Click the blue thing near the top.” “Which blue thing?” A single screenshot ends that confusion in seconds.
Dell’s own team also shares a helpful overview of screenshot methods on the screenshot on a computer, which is worth a look if you like reading from the brand that made your laptop.
Why Do Dell Laptops Feel Confusing for Screenshots?
Let me be honest. Dell makes many kinds of laptops. The Inspiron, XPS, Latitude, Vostro, and G series all look a little different. The keyboards are not exactly the same either.
On some models, the Print Screen key is clearly labeled. You will see “PrtScn” or “PrtSc” printed on it. On other models, that key shares space with another key, like F10 or Insert. When that happens, you may need to hold the Fn key at the same time.
This is the number 1 reason people think screenshots do not work on their Dell. The key is there, but it needs a helper key.
Also, Windows itself has changed over the years. Windows 10 and Windows 11 give you slightly different tools. Do not worry about this. The core shortcuts work on both.
How Do You Take a Screenshot on a Dell Laptop Step by Step?
Let us go through each method one at a time. Start with Method 1 if you are a beginner. Move on when you feel ready.
Method 1: Windows Key + Print Screen (Saves the Picture Automatically)
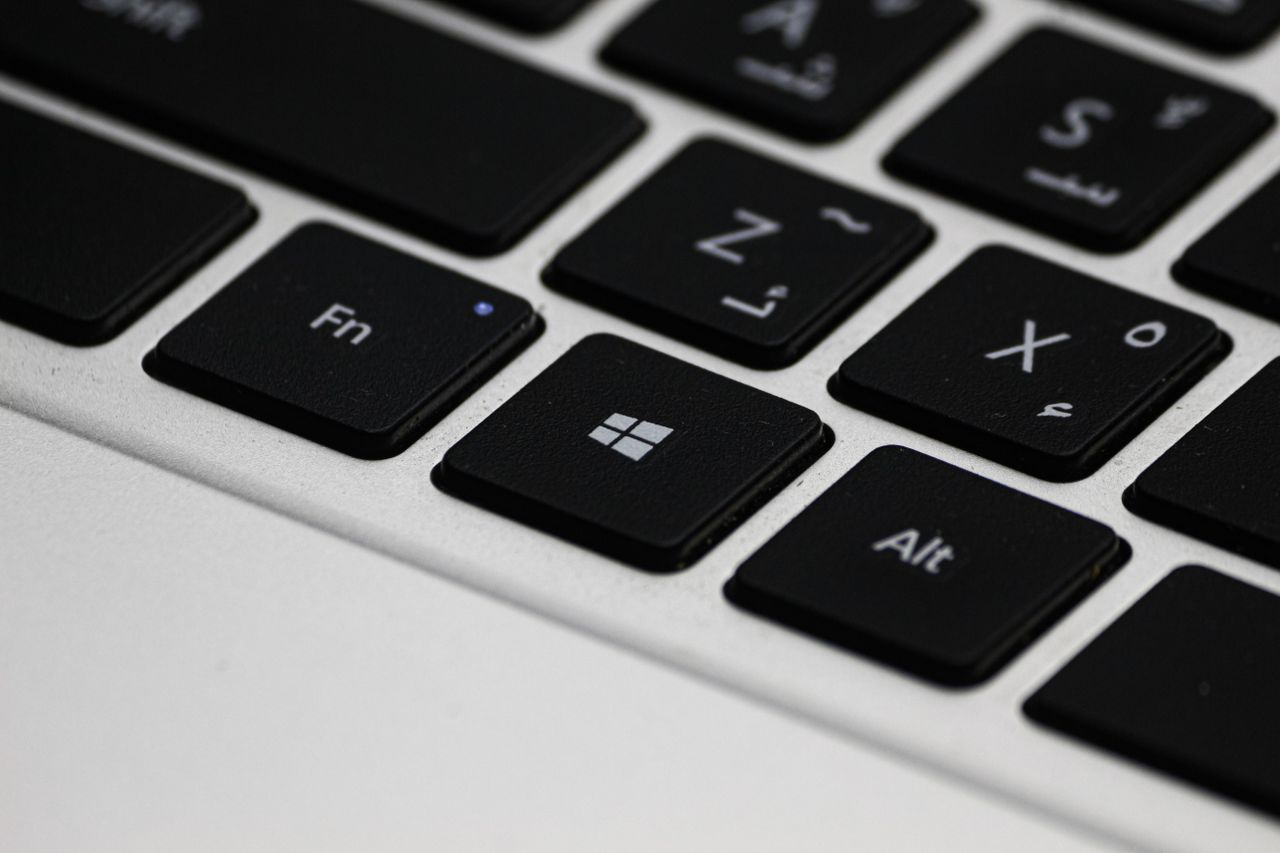
This is the easiest way to save a full screen picture without any extra steps.
- Open the page or app you want to capture.
- Press the Windows key + PrtScn at the same time.
- Your screen will dim for a moment. That means it worked.
- Open File Explorer, then go to Pictures, then Screenshots.
- Your picture is waiting there.
If your Print Screen key shares space with another key, try Windows key + Fn + PrtScn instead.
Why people like it: You do not need to paste or save anything. The file is created for you.
Method 2: Print Screen Alone (Copies the Picture to Your Clipboard)
When you press only the PrtScn key, your laptop copies the whole screen. But it does not save a file. The picture sits in a hidden spot called the clipboard.
To use it:
- Press PrtScn.
- Open an app like Paint, Word, or an email.
- Press Ctrl + V to paste.
- Save the file if you want to keep it.
This method is great when you want to paste the picture straight into a chat or a document. It is also where many beginners get stuck, because nothing seems to happen after pressing the key. The picture is there. You just have to paste it.
Method 3: Alt + Print Screen (Captures Only One Window)
Sometimes you do not want your whole screen. You only want the window you are working in. This is where Alt + PrtScn helps.
- Click on the window you want to capture so it is active.
- Press Alt + PrtScn. If needed, press Alt + Fn + PrtScn.
- Paste it with Ctrl + V into any app.
This gives you a clean picture without your taskbar or other open windows in the background. It looks neat and professional.
Method 4: Windows Key + Shift + S (Pick Exactly What You Want)
This is the favorite of many experienced users, and for good reason. It lets you choose the exact area.
- Press Windows key + Shift + S.
- Your screen turns slightly gray and a small toolbar appears at the top.
- Choose a shape: rectangle, freeform, window, or full screen.
- Drag your mouse over the area you want.
- Let go. The picture is copied to your clipboard.
- A small preview pops up in the corner. Click it to edit or save.
If you ignore the preview, you can still paste the picture with Ctrl + V anywhere.
Quick tip: If you do not see a toolbar, check that the Windows key is not locked or disabled. Some gaming keyboards turn it off.
Method 5: The Snipping Tool App
The Snipping Tool is a built in app that comes with Windows. You can open it from the Start menu by typing “Snipping Tool.”
Here is why it is handy:
- You can take a screenshot with a delay of 3, 5, or 10 seconds. This helps when you need to capture a menu that disappears when you click away.
- You can draw on your screenshot, highlight text, or crop it.
- On newer versions of Windows 11, you can also record your screen as a video.
If you ever feel nervous about keyboard shortcuts, this app is a gentle place to start. You just click a button.
Method 6: Windows Key + Alt + Print Screen (For Games and Active Windows)
This one uses the Xbox Game Bar. It saves a picture of the active window straight to your Videos folder, inside a Captures folder. It is helpful if you play games on your Dell laptop and want to capture a moment without leaving the game.
If it does not work, open Settings, go to Gaming, and make sure the Game Bar is turned on.
Where Do Screenshots Go on a Dell Laptop?
This question causes more stress than it should. You take the screenshot, and then you cannot find it. Here is a simple map.
- Windows key + PrtScn: Saved in Pictures > Screenshots.
- PrtScn alone: Copied to the clipboard. Not saved until you paste and save it.
- Alt + PrtScn: Copied to the clipboard.
- Windows key + Shift + S: Copied to the clipboard. Saved only if you click the preview and save it.
- Snipping Tool: You choose where to save it.
- Windows key + Alt + PrtScn: Saved in Videos > Captures.
If you remember only one thing, remember this: if you did not see the screen dim, the picture is probably on the clipboard, not saved yet. Paste it before you copy anything else, or you will lose it.
What Is the Fn Key and Why Does It Matter?
The Fn key sits near the bottom left of your keyboard. It is short for “Function.” On many Dell laptops, the top row of keys does double duty. For example, F10 may also be the Print Screen key.
When the Fn key is held, the second job of a key becomes active. When it is not held, the first job runs.
Some Dell laptops have a setting called Function Lock. It decides which job runs by default. If your shortcut is not working, try adding Fn to it. If that does not help, try pressing Fn + Esc to flip the Function Lock on or off.
Keyboard quirks like this can be confusing on any brand. If you have ever struggled with a keyboard setting, such as when you wanted to learn how to change the light mode on a Fantech keyboard, you already know how much a small hidden shortcut can matter. The same patience helps here.
Real Life Examples: When Screenshots Save the Day
Let me share a few simple stories that show how this skill helps in real life.
Example 1: The error message that vanished. Maha was filling out an online form for her child’s school. Right at the end, a red error message appeared. She tried to read it, but it disappeared after 3 seconds. She used the Snipping Tool with a 3 second delay.
This time she captured the message and sent it to the school office. They fixed the issue in minutes.
Example 2: The payment proof. Ali paid his electricity bill online. The website froze before showing the receipt. Luckily, he had pressed Windows key + PrtScn on the confirmation page. When the company later said they never received the payment, he had the proof.
Example 3: The helpful grandson. Imran’s grandmother kept getting lost in her email settings. Instead of explaining over the phone for the 5th time, he took a screenshot, drew a red circle around the right button, and sent it. She found it right away.
Example 4: The group project. Mira use PrtScn alone, nothing is saved. Always paste it somewhere right away.
2. Overwriting the clipboard. If you copy text after taking a screenshot, the picture is gone. The clipboard holds only 1 item at a time by default.
3. Not using the Fn key. Many Dell users press PrtScn and see nothing happen. Try adding Fn.
4. Capturing private information. Before you share a screenshot, look at it carefully. Check for passwords, bank numbers, email addresses, or personal messages in the background. Crop them out first.
5. Taking a full screen picture when you only need a small part. This makes the file big and hard to read. Use Windows key + Shift + S to focus on what matters.
6. Giving up too quickly. Some people press the keys once, see nothing, and decide their laptop is broken. In most cases, it is just a key combination issue.
7. Not checking the picture. Always open the screenshot once to confirm it shows what you wanted. It takes 5 seconds and can save you a lot of trouble.
What If the Print Screen Key Is Not Working?
This is a real source of frustration, so let us solve it calmly. Try these fixes in order.
- Add the Fn key. Try Fn + PrtScn or Windows key + Fn + PrtScn.
- Check Function Lock. Press Fn + Esc and try again.
- Restart your laptop. It sounds simple, but it fixes many small glitches.
- Close background apps. Some apps take control of the Print Screen key. Cloud storage tools and screen recorders are common ones.
- Update Windows. Go to Settings, then Windows Update, and install anything waiting.
- Update your keyboard driver. Open Device Manager, find Keyboards, right click your keyboard, and choose Update driver.
- Try another method. The Snipping Tool works even if your keyboard key is broken.
If none of these work, your keyboard may have a hardware problem. We will talk about when to get help a little later.
How Do You Take a Scrolling or Long Screenshot on a Dell Laptop?
Windows does not have a built in scrolling screenshot tool on most versions. But you still have options.
- Use your browser. Browsers like Microsoft Edge have a Web Capture tool. Press Ctrl + Shift + S in Edge and choose to capture the full page.
- Take several screenshots. Scroll a little, capture, scroll again, and capture. Then place them together in a document.
- Use a trusted extension. Many browsers offer free extensions for full page capture. Always read reviews and pick one with many users.
This is a feature many people only discover after hours of frustration. Now you know.
Advanced Strategies for Better Screenshots
You have covered the basics. Now let us look at a few things that make your screenshots look sharper and more useful.
Use Cloud Clipboard History
Press Windows key + V to open the clipboard history. If you have it turned on, Windows can remember several items, including screenshots. This helps if you copy something by mistake.
A plain screenshot can still confuse people. Use the Snipping Tool or Paint to add arrows, circles, or highlights. A red circle is worth a thousand words.
Name Your Files Clearly
Default names like “Screenshot (47)” are not helpful later. Rename important ones, like “Electricity Bill Nov 2026.” You will thank yourself in 6 months.
Set a Fixed Folder
If you take many screenshots, create a folder on your desktop called “Screenshots to Sort.” Move your pictures there once a week. This keeps your Pictures folder tidy.
Sometimes a screenshot is not enough, and you want to show something live. If you use Discord for study groups or gaming, it helps to know how to screenshare on a Discord server. You can use screenshots for quick things and screen sharing for longer explanations.
Keep Image Quality in Mind
Screenshots from a high resolution screen can be large files. If you plan to email a few of them, you may want to crop them first. Smaller files send faster and open easily on a phone.
What Related Topics Should You Learn Next?
Once you are comfortable with screenshots, a few related skills will make your daily laptop life even smoother. Think of these as the next steps on your learning path.
Screenshots on other Windows versions. Windows 10 and Windows 11 have small differences. It helps to know how each one handles the Snipping Tool and shortcuts.
Screen recording. A screenshot is a still picture. A screen recording is a video. It is perfect for teaching someone a process, like how to set up an app. Your Dell laptop can record using the Xbox Game Bar or the newer Snipping Tool.
Fixing keyboard shortcuts that do not work. If Print Screen, Fn, or the Windows key is acting strange, you need to know how to check settings and drivers.
Editing and marking up pictures. Learning how to crop, blur, and highlight makes your screenshots clearer and safer to share.
Screenshots on other brands. If you use HP, Lenovo, or Acer laptops at work or school, the basic shortcuts are almost the same. The Fn key rules may change a little.
Managing your storage. Screenshots can pile up. Learning how to clean up files keeps your laptop fast.
Small tech skills often connect to each other. For example, once you start sharing screenshots through apps, you may also want your audio to sound right.
If your sound is too quiet while watching tutorials, you might like to learn how to make your AirPods louder. Good screenshots and good sound together make learning online much easier.
When Should You Get Expert Help?
Most screenshot problems are small and easy to fix. But there are times when asking for help is the wise choice.
Consider reaching out to a trusted technician or Dell support if:
- Your keyboard keys are physically stuck or not responding at all.
- You see strange error messages every time you press a key.
- Your laptop freezes whenever you try to take a screenshot.
- You have tried every fix above and nothing changed.
- Your laptop is under warranty and you suspect a hardware fault.
There is no shame in asking. A good technician can solve in 10 minutes what might take you 3 hours of worry. And if your laptop is still under warranty, using it is simply smart.
When you do call for help, a screenshot of the problem (if you can take one) makes the conversation faster. It is a small habit that pays off again and again.
What Are the Future Trends for Screenshots?
Screenshot tools are getting smarter every year. Here is what you can expect to see more of.
Text from images. Newer versions of the Snipping Tool can pick out text from a screenshot. This lets you copy words from a picture without typing them again. It is very helpful for scanned notes or images of documents.
Built in recording. Screen recording is now part of the same tool as screenshots. Switching between a photo and a video takes just 1 click.
Better editing tools. Simple tools for blurring private details, drawing arrows, and adding text are becoming standard.
Cloud syncing. More people save pictures straight to online storage so they can open them on a phone, a tablet, or another computer.
Smarter sharing. Sharing a screenshot with one click to chat apps and email is getting easier.
You do not need to chase every new feature. Just keep your Windows updated, and you will get these tools as they arrive.
Quick Reference: Dell Screenshot Shortcuts
Here is a simple list you can remember or save.
- Full screen, saved automatically: Windows key + PrtScn
- Full screen, copied: PrtScn
- Active window, copied: Alt + PrtScn
- Pick an area: Windows key + Shift + S
- Open Snipping Tool: Search “Snipping Tool” in Start
- Game Bar capture: Windows key + Alt + PrtScn
- If keys do not work: Add the Fn key to the combination
Frequently Asked Questions
1. How do you take a screenshot on a Dell laptop without a Print Screen key?
Use Windows key + Shift + S to open the snipping toolbar. You can also open the Snipping Tool app from the Start menu. Both work without a Print Screen key.
2. Why is my Dell screenshot not saving?
If you pressed PrtScn alone, the picture is only copied, not saved. Paste it into Paint or a document and save it. To save automatically, use Windows key + PrtScn.
3. Where are screenshots saved on a Dell laptop?
Pictures taken with Windows key + PrtScn go to Pictures, then Screenshots. Pictures taken with the Game Bar go to Videos, then Captures.
4. How do you screenshot only part of the screen on a Dell?
Press Windows key + Shift + S. Then drag your mouse over the area you want. The picture is copied, and you can paste it anywhere.
5. Do I need to press Fn to take a screenshot on a Dell?
It depends on your model. Some Dell laptops need Fn with PrtScn because the key shares space with another one. If the plain shortcut does not work, add Fn.
6. Can I take a screenshot on a Dell laptop with a delay?
Yes. Open the Snipping Tool and choose a delay of 3, 5, or 10 seconds. This is helpful for menus that disappear when you click.
7. Are screenshots the same on Windows 10 and Windows 11?
The main shortcuts are the same on both. Windows 11 has a more modern Snipping Tool with extra features like recording and text actions.
Conclusion: You Can Do This
Taking a screenshot on a Dell laptop does not have to feel like a puzzle. You now know 6 different ways to do it, where your pictures go, what mistakes to avoid, and how to fix things when a key does not respond.
If you feel a little unsure, that is completely normal. Everyone starts somewhere. Even people who work with computers all day learned these shortcuts one at a time.
Your next step is simple. Open any page on your laptop right now and try Windows key + Shift + S. Drag your mouse over a small area. Then open a Paint window and press Ctrl + V. When you see your first picture appear, you will realize how easy it really was.
Keep this guide handy, and come back whenever you need a quick reminder. You are more capable with your laptop than you think.