
 Harriet Wetton
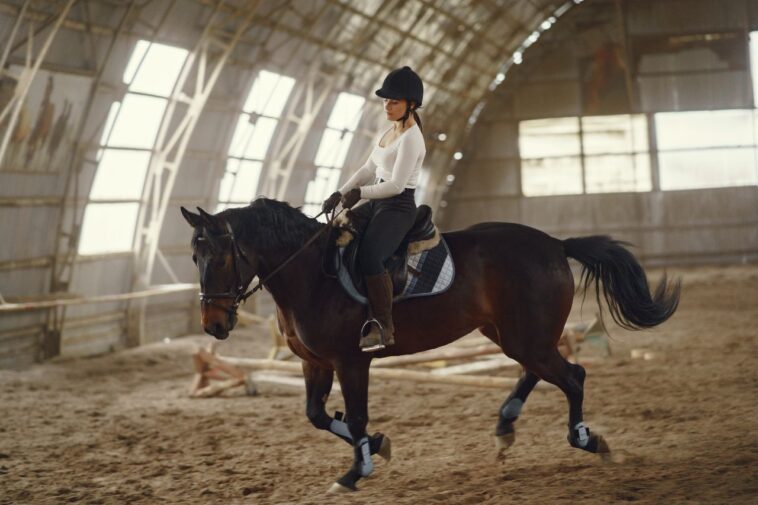
Riding a horse for the first time, or even the hundredth, can feel equal parts thrilling and humbling. You sit atop a 1,000-pound animal with its own thoughts, fears, and opinions.
In those early moments, every bump feels huge, every sudden movement makes your heart jump, and you might wonder: How do I get this massive animal to understand what I want without fighting me?
If you have ever felt frustrated because your horse ignored your cue, pulled against your hands, or suddenly stopped in the middle of an arena, take a deep breath. You are not alone. Equine communication is not about physical strength, pulling harder, or shouting commands.
It is a quiet, shared language built on physical harmony, timing, and mutual trust.
Learning how to communicate with a horse while riding comes down to mastering four core aids: your seat, legs, hands, and voice. When these elements work together, riding changes from an exercise in physical frustration into an effortless conversation.
Foundational Principles: How Horses Process Rider Signals
Before jumping into physical cues, it helps to look at the world through your horse’s eyes. Horses are prey animals, which means their brains are hardwired for self-preservation, safety, and sensitivity.
Your communication relies on four natural cue aids:
-
Seat: Controls weight distribution, core balance, and overall speed.
-
Legs: Regulate rhythm, forward movement, and direction.
-
Hands: Guide head position, lateral flexion, and turning.
-
Voice: Sets the cadence, mood, and reinforces intent.
The Biology of Equine Sensitivity
A horse can feel a single fly land on its flank. That means your horse feels every shift in your body mass, every tension in your shoulders, and every change in your breath.
To dive deeper into the science of sensory processing, reviewing clinical studies on horse touch sensitivity research reveals how microscopic hair follicle nerve endings react to tiny pressure changes.
When riders experience communication breakdowns, it is rarely because the horse is being stubborn. More often, the rider is sending conflicting signals, like pressing forward with the legs while pulling back on the reins.
Pressure and Release (The Secret to Horse Training)
Horses do not learn from pressure itself; they learn from the release of pressure.
-
When you apply pressure (such as a gentle squeeze with your calves), you create a request.
-
The instant the horse responds appropriately, you release that pressure.
-
That moment of relief tells the horse’s brain, “Aha! That was the right answer.”
If you hold pressure after the horse yields, the horse becomes confused, frustrated, or desensitized.
The 4 Core Riding Aids Explained
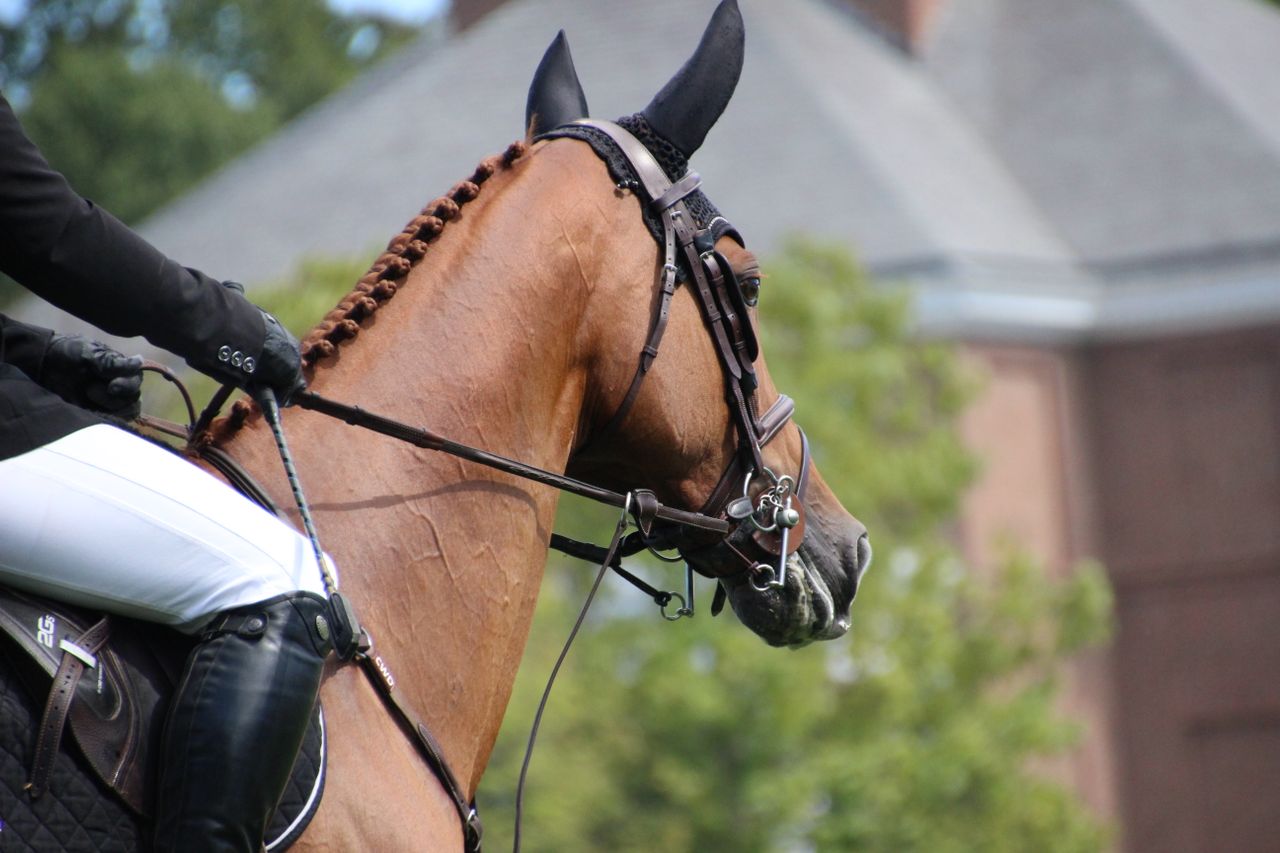
Effective riding relies on a clear hierarchy of aids. Always use the softest signal first, starting from your core and moving outward to your hands:
-
Seat and Core: Shift your balance and adjust your riding rhythm first.
-
Leg Aids: Direct energy and maintain forward movement second.
-
Rein Aids: Guide direction and flex the frame third.
-
Voice Aids: Reinforce your overall intent and pace throughout.
1. The Seat and Weight Aids
Your seat is your primary communication channel. It controls speed, rhythm, and direction before your hands or legs ever need to intervene.
-
Asking for Forward Motion: Open your hips and follow the natural motion of the horse’s back.
-
Asking for a Slow Down or Halt: Deepen your seat, sink your weight into your heels, engage your core, and stop your hip motion.
-
Turning: Look where you want to go. Turning your eyes and shoulders naturally shifts your weight onto your inner seat bone, signaling the turn to your horse.
2. The Leg Aids
Leg aids drive energy, govern rhythm, and control lateral movement.
-
Both Legs at the Girth: A gentle, rhythmic squeeze asks the horse to move forward or step up into a faster gait.
-
Inside Leg at the Girth: Keeps energy moving forward and prevents the horse from cutting corners.
-
Outside Leg Behind the Girth: Acts as a boundary, keeping the hindquarters from drifting outward during turns.
3. The Rein (Hand) Aids
Your hands guide direction, support lateral flexion, and frame energy. They should never act as brakes pulled with force. Organizations following modern equine welfare guidelines emphasize soft, non-punitive bit contact to protect the animal’s mouth.
-
Direct Rein: Guiding hand opens slightly in the direction of the turn.
-
Indirect Rein: Pressing the rein lightly against the horse’s neck to guide the shoulder away.
-
Elasticity: Maintain a light, consistent connection—similar to holding a pair of small songbird eggs. You want to keep them safe without crushing them.
4. Voice Aids
While horses do not process human vocabulary like we do, they are exceptionally attuned to vocal cadence, pitch, and tone.
-
Calming Tone: Low, drawn-out words (like “whoa” or “easy”) lower a horse’s heart rate.
-
Upbeat Tone: Short, crisp sounds (such as a tongue-cluck) encourage forward energy.
Step-by-Step Guide: How to Apply Combined Aids
Riding aids are rarely used in isolation. To execute smooth transitions and clean movements, follow a simple 4-step sequence:
-
Step 1 (Prepare): Sit tall, engage your core, and look toward your target.
-
Step 2 (Cue): Squeeze your calves for upward movement, or deepen your seat for downward movement.
-
Step 3 (Reinforce): Add a gentle vocal prompt or subtle rein pulse if needed.
-
Step 4 (Release): Instantly soften all aids the moment the horse responds.
Step 1: Requesting a Walk-to-Trot Upward Transition
-
Prepare: Sit tall, drop your shoulders, and look straight ahead between the horse’s ears.
-
Signal: Give a light, rhythmic squeeze with both calves at the girth.
-
Voice Support: Add a soft double cluck with your tongue.
-
Follow Through: Open your hands slightly to allow the horse’s neck to lengthen as it steps into the trot.
-
Release: As soon as the horse trots, soften your leg pressure and match the rhythm with your seat.
Step 2: Executing a Smooth Trot-to-Walk Downward Transition
-
Prepare: Exhale softly, deepen your seat, and brace your abdominal muscles.
-
Signal: Close your thighs slightly and apply light, steady upward tension on the reins.
-
Voice Support: Speak a calm, low-pitched “whoa” or “a-n-d walk.”
-
Release: The instant the horse drops into the walk, yield your hands forward and relax your core.
Real-Life Example: Fixing the “Spotted Monster” Reaction
Consider a common scenario: You are riding along an arena fence when your horse suddenly stops, raises its head, and stares at a plastic bag fluttering near a post.
The Misunderstanding
A panicked rider freezes, grabs the reins tightly, presses hard with their legs, and yells. To the horse, this sudden rider tension confirms that the bag really is a predator.
The Clear Communication Approach
-
Exhale and Decompress: Soften your lower back and lower your center of gravity.
-
Redirect Focus: Use your inside leg to push the horse’s belly slightly outward while keeping your hands quiet.
-
Vocal Reassurance: Speak in a slow, rhythmic tone to signal that all is well.
-
Reward Curiosity: When the horse lowers its head or takes a single step past the object, relax all pressure immediately.
Common Mistakes to Avoid
Even experienced riders fall into subtle body habits that confuse their horses.
The biggest mistake is Signal Conflation, pressing your legs to say “Go” while simultaneously pulling on the reins to say “Stop.” The solution is to always release rein pressure before asking for forward movement.
1. Giving Conflicting Signals
Pressing your legs against the horse’s ribs while pulling back on the reins sends mixed messages. Decouple your hands from your legs. If you ask for forward motion, your hands must yield to allow movement.
2. Using “Heavy” Hands
Fixing your hands in place or leaning on the reins pulls directly on the sensitive bars of the horse’s mouth. This leads to a dull, unresponsive mouth or head-tossing behavior.
3. Riding with Rigid Tension
Holding tension in your shoulders, back, or thighs blocks the natural wave of motion traveling through the horse’s spine. A tense rider creates a stiff horse.
4. Delayed Timing of the Release
Releasing pressure three seconds after the horse yields is too late. The release must happen within the exact second of the desired behavior for the horse to form the mental association.
Advanced Communication: Developing Softness and Collection
Once basic transitions and turns feel smooth, you can begin refining your communication to build softness and balance.
Flexion and Softness at the Poll
Softness is not about forcing a horse’s head into a vertical shape. It is a state of physical relaxation where the horse yields to gentle rein pressure at the poll (the area right behind the ears).
-
Lateral Flexion: Ask the horse to flex its neck slightly to the left or right while maintaining forward momentum.
-
Vertical Flexion: Use subtle finger pulses on the reins to encourage the horse to soften its jaw and arch its neck softly.
Introducing Lateral Signals
Lateral work, like leg-yields or shoulder-in movements, refines your leg aids.
-
Leg-Yielding: The horse moves forward and sideways simultaneously. If moving to the right, your left leg pushes the horse sideways at the girth while your right leg maintains forward momentum.
-
Half-Halts: A momentary balance check using a brief seat-and-core engagement followed by a soft rein cycle. It prepares your horse for an upcoming transition without coming to a complete stop.
When to Seek Professional Guidance
Riding should always be safe, educational, and fun. If you hit a persistent communication barrier, working with an experienced professional is the best way forward.
Look for accredited programs via certified riding instructors if:
-
Your horse displays reactive behaviors like rearing, bucking, or bolting.
-
You feel persistent physical anxiety that causes you to freeze in the saddle.
-
You cannot execute downward transitions without a physical tug-of-war.
An experienced coach can observe your seat alignment from the ground and point out subtle body habits you might not even feel happening.
The Evolution of Horsemanship
Equine training and riding methodologies have evolved dramatically over recent decades.
-
Traditional Horsemanship: Focused heavily on force-based cues, heavy bit pressure, and establishing compliance through dominance.
-
Modern Horsemanship: Prioritizes biomechanical alignment, subtle weight and seat cues, and mutual trust rooted in behavioral science.
Riders today are discovering that subtle body movements achieve far better results than heavy equipment. As understanding of equine cognitive processing continues to grow, the focus shifts toward true partnership, where rider and horse move together as one fluid unit.
Frequently Asked Questions
Why does my horse speed up when I try to turn?
This often happens when a rider pulls sideways on a single rein without using their outside leg or seat weight. The horse loses its balance, leans outward, and speeds up to prevent itself from falling. Support the turn with your outside leg and keep your seat centered.
How tight should my rein contact be?
You want to maintain a light, elastic connection, roughly equivalent to the weight of a slight handshake. You should feel the rhythmic movement of the horse’s head without feeling heavy pulling or slack in the leather.
Can a horse really feel me shift my weight?
Yes! A horse’s back contains a dense network of nerve endings. Small shifts in your posture, such as dropping a hip or turning your ribcage, are immediately felt through the saddle tree.
What should I do if my horse ignores my leg aids?
Avoid kicking harder repeatedly. Instead, use a clear escalation: apply a light squeeze, then a firmer squeeze, and if there is no response, reinforce the aid with a vocal cluck or a gentle tap from a riding crop. The moment the horse steps forward, release all pressure immediately.
How do I stop gripping with my knees when I get nervous?
Gripping with your knees actually pushes your seat up and out of the saddle, making you feel less secure. Exhale deeply, drop your weight down into your heels, and focus on letting your legs hang long and soft around the horse’s barrel.
Final Thoughts: Building a Lifelong Partnership
Learning how to communicate with a horse while riding is a rewarding journey that requires patience, self-awareness, and practice. Every ride offers a chance to refine your timing, soften your hands, and listen more closely to what your horse is telling you.
Focus on making small, steady improvements. Celebrate the moment your horse responds to a subtle seat cue or slows down at your softest vocal whisper.
For more actionable guides on personal growth, wellness, and practical skill-building, explore the helpful resources across WillingToDo. If you are balancing a busy lifestyle, check out our guide on how to build a daily self care routine that works to keep your mind and body grounded.