
 Harriet Wetton
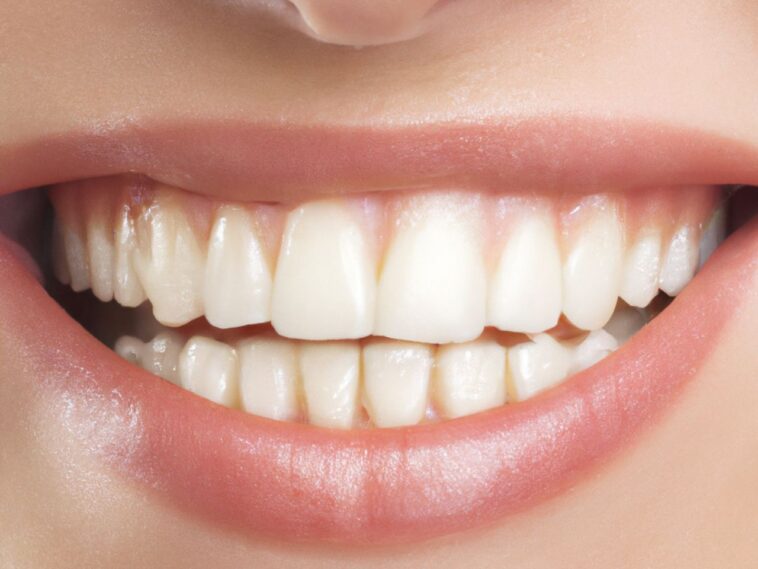
Have you ever looked in the mirror while brushing your teeth, spotted a tiny dark mark on a back molar, and immediately felt a wave of worry? You are not alone.
Tooth trouble has a way of sneaking up on us. One day everything feels completely fine, and the next day you are staring at a strange spot, wondering if it is just a harmless coffee stain or the start of a costly dental issue.
Understanding what a cavity looks like in its early stages can save you from unexpected toothaches, long appointments, and expensive treatments. The truth is that cavities do not start as big black holes overnight. They begin quietly, often shifting in color, texture, and appearance long before you ever feel physical pain.
By learning the early visual signs, you can take control of your oral health today. In this complete guide, we will break down every single stage of decay, show you what to look out for at home, and give you clear, practical steps to protect your smile.
What Is a Cavity and Why Does It Develop?
A cavity is permanent damage to the hard surface of your tooth that develops into tiny openings or holes. It is the result of tooth decay, a process that happens gradually over time.
Every single day, a thin, sticky film of bacteria called plaque forms on your teeth. When you eat or drink foods containing sugars or carbohydrates, the bacteria in plaque feed on these sugars and produce acids.
These acids act like tiny tools that slowly wear away the strong outer layer of your tooth, known as enamel.
If this acid exposure happens repeatedly without proper cleaning, the enamel loses essential minerals. Over time, the outer defense breaks down, opening the door for decay to move deeper into the tooth structure.
The Structure of Your Tooth
To understand how decay looks as it moves, it helps to picture your tooth in 3 distinct layers:
-
Enamel: This is the hard, translucent outer shell of the tooth. It is the hardest substance in the human body, but it is not indestructible. Decay in this outer layer is completely painless and often reversible.
-
Dentin: Located directly under the enamel, dentin is a softer, yellowish layer containing microscopic tubes that lead straight to the nerve. Once decay breaches the enamel and touches the dentin, you may start noticing sensitivity to hot, cold, or sweet foods.
-
Pulp: This is the living heart of the tooth, containing blood vessels and sensitive nerves. If decay reaches the pulp, it causes severe pain, swelling, and infection that requires professional care.
Understanding these layers helps explain why a cavity changes appearance so drastically as it grows. What starts as a simple, chalky white spot on the enamel can eventually transform into a dark brown or black hole as it digs into the deeper layers of the tooth.
What Does a Cavity Look Like at Each Stage?
Cavities do not appear out of nowhere. They follow a predictable timeline. By recognizing the visual signs at each phase, you can catch decay at its most treatable point.
| Stage | Name | Visual Appearance & Symptoms |
| Stage 1 | Demineralization | Chalky white spots on enamel; no surface break or physical hole yet. |
| Stage 2 | Enamel Decay | Surface turns light brown or yellowish; minor micro-fractures appear. |
| Stage 3 | Dentin Decay | Visible dark brown or black hole; causes temperature and sweet sensitivity. |
| Stage 4 | Pulp Damage | Large visible hole; tooth appears hollow or gray with deep, constant pain. |
| Stage 5 | Abscess | Visible pimple-like bump on gums, facial swelling, and severe infection. |
Stage 1: The Chalky White Spot (Demineralization)
In the very earliest stage, a cavity does not look black or brown at all. In fact, it looks like a faint, chalky white spot on the surface of the tooth.
This white spot indicates an area where acid has stripped away essential minerals like calcium from the enamel. The surface loses its natural shine and looks slightly dull or frosty compared to the surrounding smooth enamel.
You will often find these white marks right along the gumline or around dental braces where plaque collects easily.
Can you reverse it? Yes. At this stage, there is no physical hole in the tooth yet. By improving your brushing habits, cutting back on sugary snacks, and using fluoride toothpaste, you can remineralize the enamel and stop the cavity in its tracks.
Stage 2: Enamel Breakdown (Surface Decay)
If mineral loss continues unchecked, the enamel begins to break down further. The chalky white spot starts to change color, turning into a light yellow or tan stain.
At this point, the surface of the enamel weakens and tiny micro-fractures appear. While there may not be an obvious hole that you can feel with your tongue, the discolored area becomes more noticeable in the mirror.
Because the decay is still strictly within the enamel layer, you will likely feel zero pain or sensitivity. This is why regular checkups are so vital, as a dentist can spot this visual change long before you ever feel discomfort.
Stage 3: Dentin Decay (Visible Darkening and Cavitation)
Once decay breaks through the hard enamel boundary, it reaches the softer dentin layer underneath. Because dentin is much softer than enamel, decay spreads through it at a much faster speed.
Visually, this is when classic cavity features show up:
-
The discolored spot turns dark brown or deep black.
-
A visible pit, notch, or hole forms on the surface or side of the tooth.
-
Shadowing appears beneath the enamel, making the tooth look gray or hollow from the inside.
At this stage, you will likely feel physical warning signs. Cold drinks, sweet snacks, or hot foods might trigger a sudden, sharp zinger of sensitivity.
Stage 4: Pulp Involvement (Deep Structure Damage)
If the cavity is left untreated in the dentin, it continues digging straight toward the pulp chamber. When bacteria invade the pulp, the nerves and blood vessels become inflamed and infected.
At this point, the visual signs are unmistakable. You will see a clear, dark hole in the tooth, often with visible decay chipping away the surrounding enamel edges. The tooth may look noticeably darker than the adjacent teeth, taking on a dull gray or brownish tint.
Pain becomes a constant companion, ranging from a dull ache to an intense, throbbing sensation that keeps you awake at night.
When damage reaches this level, simple fillings are no longer enough. You will need a specialized procedure to save the natural tooth structure.
If you are wondering what that involves and how long it takes, read our detailed guide on how long does a root canal take to prepare yourself for the treatment process.
Stage 5: Abscess Formation
This is the final and most severe stage of untreated decay. When the infection inside the pulp chamber has nowhere else to go, it pushes out through the tip of the tooth root into the surrounding jawbone and gum tissue.
Visual signs of an abscess include:
-
A visible bump or pimple-like swell on the gums near the infected tooth.
-
Severe swelling in the gums, cheek, or side of the face.
-
Redness and inflammation around the affected area.
-
A dark, severely damaged tooth structure.
An abscess is a serious medical issue that requires immediate professional treatment. The infection will not go away on its own and can spread to other areas of the body if ignored.
Where Do Cavities Usually Form?
Cavities do not show up randomly. They form in specific areas of the mouth where food particles, bacteria, and plaque accumulate most easily.
| Cavity Location | Where It Occurs | Visual Appearance |
| Pit & Fissure | Deep grooves on the chewing surfaces of back molars | Dark lines, specks, or spots nestled in crevices |
| Interdental | Tight spaces between two adjacent teeth | Subtle gray or dark shadows beneath translucent enamel |
| Smooth Surface | Flat outer or inner sides along the gumline | Horizontal chalky white or brown bands |
| Root Decay | Exposed root surfaces near receding gums | Softened brownish or yellowish patches at the tooth base |
1. Pit and Fissure Cavities (Chewing Surfaces)
These form in the narrow grooves, pits, and valleys on the top surfaces of your back teeth (molars and premolars).
Food easily gets trapped in these deep grooves, making them the most common location for decay in children and teenagers. Visually, they appear as dark lines or tiny black specks nestled deep inside the crevices of the tooth.
2. Interdental Cavities (Between Teeth)
These occur in the tight spaces where two adjacent teeth touch. Because toothbrush bristles cannot reach between teeth, plaque builds up unchecked if you do not floss daily.
These cavities are tricky to spot visually in the mirror. They often look like a subtle dark shadow underneath the translucent enamel of the tooth surface.
3. Smooth Surface Cavities (Flat Sides)
These form on the flat, smooth outer or inner sides of your teeth, particularly along the gumline where plaque settles after meals. They start as chalky white horizontal lines parallel to the gums and are the easiest type of cavity to spot early on.
4. Root Cavities (Exposed Roots)
As people age, gums often recede or pull back, exposing the roots of the teeth. Tooth roots are not covered by protective enamel; instead, they are covered by a softer material called cementum.
Root cavities develop quickly, appearing as brownish, softened areas right near the gumline.
Cavity vs. Stain vs. Tartar: How to Tell the Difference
Not every dark spot or mark on your tooth is a cavity. It is very common to confuse tooth decay with surface staining or hardened plaque. Here is a clear guide to help you tell them apart.
| Visual Feature | Tooth Cavity | Surface Stain | Tartar (Calculus) |
| Color | Chalky white, tan, dark brown, or black | Yellow, brown, orange, or dark purple | Yellowish-white, tan, or dark brown |
| Texture | Soft, sticky, or a physical pit/hole | Completely smooth, matches rest of tooth | Rough, hard, crusty buildup |
| Location | Grooves, between teeth, or gumline | Front surfaces, edges, or near fillings | Base of teeth, behind lower front teeth |
| Sensation | Often causes sensitivity to cold/sweet | Zero sensitivity or pain | Zero sensitivity, but gums may bleed |
| Can Be Brushed Off? | No | No (requires dental polish) | No (requires professional scaling) |
How to Do a Safe Check at Home
If you see a dark spot on your tooth, avoid using sharp objects like pins or needles to poke at it. Poking a delicate area of enamel can break the weakened tooth structure and push bacteria deeper into the dentin. Instead:
-
Dry the tooth surface gently with a tissue or cotton swab.
-
Direct a bright light toward the area using a small flashlight or smartphone light.
-
Look for depth or texture changes. Stains lie flat on the surface, while decay creates a noticeable dip, shadow, or rough pit.
What Does a Cavity Feel Like? Physical Signs to Watch For
Visual signs are only half the story. Your body often sends physical warnings that a tooth is struggling long before you notice a dark hole in the mirror.
-
Temperature Sensitivity: A sudden, sharp reaction when drinking ice water or sipping hot coffee. If the sensitivity lingering for more than a few seconds, decay may have reached the dentin.
-
Sweet Sensitivity: Feeling a sharp twinge or dull ache specifically when eating sugary treats like candy, chocolate, or dried fruit.
-
Pain When Biting Down: Experiencing a sudden dull pain or pressure when chewing food on a specific tooth.
-
Unpleasant Taste or Bad Breath: Persistent bad breath or a bitter taste that does not go away after brushing or using mouthwash. This is caused by bacteria living inside an active cavity pit.
-
Food Getting Trapped: Constantly finding food shreds stuck in the exact same spot between your teeth every time you eat. This often happens when a hidden cavity creates a gap or jagged edge between two adjacent teeth.
Real-Life Scenarios: How Decay Unfolds Everyday
To make these concepts even easier to picture, let us look at two real-world examples of how cavities present themselves in daily life.
Scenario A: The Hidden Molar Shadow
Lavanya, a 28-year-old graphic designer, noticed that every time she drank iced tea, her lower left molar gave a slight twinge.
When she looked closely in the bathroom mirror, the top of the tooth looked fine, but she noticed a faint gray shadow underneath the surface edge. She ignored it for three months, assuming it was just a stain from drinking tea.
Eventually, while eating popcorn, a small piece of the upper enamel cracked off, revealing a deep brown hole underneath.
What looked like a harmless shadow was actually an interdental cavity that had quietly hollowed out the dentin beneath the enamel. Because she waited, a simple small filling became a larger restoration.
Scenario B: The Chalky Gumline
Mark, a 42-year-old accountant, noticed thin, chalky white lines running right along his gumline on his lower front teeth. He assumed his teeth were just getting dry from breathing through his mouth at night.
After talking with his dental hygienist, he learned these lines were the very first stage of smooth surface demineralization. Mark started flossing daily, switched to an electric toothbrush, and used high-fluoride toothpaste every night before bed.
Within six months, the mineral loss stopped, the enamel strengthened, and he avoided needing any fillings altogether.
Common Mistakes People Make with Cavities
When dealing with potential tooth decay, small misunderstandings can lead to much bigger problems down the road. Avoid these common mistakes:
-
Waiting for Pain Before Taking Action: This is the single biggest mistake people make. Enamel has no nerves, which means early cavities never hurt. If you wait until a tooth aches, the decay has already reached the deeper, sensitive layers.
-
Brushing Too Hard on Sensitive Spots: Scrubbing a weakened spot with a hard-bristled brush will not clean away a cavity. In fact, aggressive brushing wears away fragile enamel faster. Always use a soft-bristled brush and gentle circular movements.
-
Using Home Tools to Pick at Teeth: Never try to scrape away dark spots or tartar with metal tools at home. You can easily chip surrounding enamel or injure your delicate gum tissue.
-
Relying Only on Mouthwash: While antibacterial mouthwash helps reduce plaque bacteria, it cannot remove stuck food particles or rebuild broken enamel on its own. It is a helpful tool, but not a replacement for brushing and flossing.
-
Ignoring Financial Stress Until It Is Too Late: Many people avoid checking a suspicious tooth because they fear the repair cost. However, treating a cavity early is far cheaper than fixing deep structural damage later.
If you are struggling with dental expenses, check out our helpful guide on my teeth are rotting and I have no money for realistic, lower-cost solutions and practical steps.
Practical Daily Steps to Prevent Cavities
Preventing cavities is far easier, more comfortable, and less expensive than treating them. By adopting a few consistent daily habits, you can keep your enamel strong and healthy.
| Time of Day | Recommended Prevention Action |
| Morning | Brush for 2 minutes with fluoride toothpaste using gentle circular motions. |
| Daytime | Rinse mouth thoroughly with water after meals, snacks, or sugary drinks. |
| Evening | Floss between all teeth to remove hidden plaque and food particles. |
| Nighttime | Brush for 2 minutes; spit out excess toothpaste without rinsing immediately. |
1. Master the 2×2 Brushing Technique
Brush your teeth twice a day for two full minutes each time. Angle your soft-bristled toothbrush at 45 degrees toward your gumline and move in gentle, small circular strokes. Make sure to clean the outer, inner, and chewing surfaces of every single tooth.
2. Make Flossing a Non-Negotiable Habit
Flossing removes plaque and trapped food from between teeth where toothbrush bristles simply cannot fit. Slide the floss gently between your teeth, curve it into a “C” shape against the side of each tooth, and move it gently up and down beneath the gumline.
3. Use Fluoride Toothpaste Correctly
Fluoride is a natural mineral that strengthens tooth enamel and helps rebuild areas weakened by acid exposure. After brushing at night, spit out the excess toothpaste but refrain from rinsing immediately with water.
a thin layer of fluoride on your teeth overnight gives it more time to strengthen your enamel.
4. Watch Your Snacking Habits
It is not just how much sugar you eat, but how often you eat it. Every time you consume sugary or starchy foods, your teeth face an acid attack that lasts for roughly 20 minutes.
Constant snacking throughout the day keeps your teeth in a continuous state of acid exposure. Try to keep sweet treats to mealtimes and drink water throughout the day to flush away lingering food bits.
5. Drink Plenty of Fluoridated Water
Tap water in many communities contains fluoride, making it one of the simplest and most effective ways to protect your teeth. Drinking water also stimulates saliva production.
Saliva is your body’s natural defense mechanism, neutralizing harmful acids and supplying teeth with essential calcium and phosphate.
When to Seek Professional Dental Help

Self-monitoring at home is great, but it should never replace regular professional care. You should schedule a dental visit right away if you notice any of the following signs:
-
Visible holes, pits, or dark spots that do not wipe away with a clean cloth.
-
Sharp, lingering pain when eating hot, cold, or sweet foods.
-
Persistent aching or throbbing pressure in a specific tooth.
-
Swelling, bleeding, or redness in the gums surrounding a tooth.
-
A cracked, chipped, or broken tooth edge.
-
A foul taste in your mouth that persists despite thorough brushing.
Professional dental clinics use digital X-rays and specialized light tools that can detect decay long before it becomes visible to the human eye.
According to the Centers for Disease Control and Prevention, tooth decay remains one of the most common chronic conditions, yet it is almost entirely preventable with early visual detection and routine dental visits. Catching decay early means simpler treatments, less surface removal, and lower costs.
Emerging Technology in Early Decay Detection
The field of dentistry is continuously evolving, making early decay detection faster, easier, and completely painless. In the past, dentists relied mostly on visual checks and metal probes to find soft spots on teeth. Today, modern technology provides far greater precision:
-
Laser Fluorescence Detection: Small handheld instruments bounce laser light off tooth surfaces. Healthy enamel reflects light differently than decayed enamel, allowing dentists to detect hidden cavities beneath the surface before a visible hole ever forms.
-
Digital Intraoral Cameras: Tiny cameras capture high-definition, magnified images of your teeth and display them instantly on a screen. This allows you to see exactly what the dentist sees, making it much easier to track early chalky spots or small fissures.
-
3D Digital Radiography: Modern digital X-rays use significantly less radiation while producing crystal-clear images of tight spaces between teeth, revealing hidden interdental decay early on.
FAQs About What Cavities Look Like
1. What does a cavity look like when it first starts?
A cavity first appears as a small, chalky white spot on the tooth surface. This white mark indicates that minerals have been lost from the enamel. At this early stage, there is no hole, and decay can still be stopped or reversed with proper care.
2. Can a cavity be white or yellow instead of black?
Yes. Early cavities often look chalky white or light yellow. They only turn brown or black after decay breaks through the outer enamel layer and reaches the softer dentin underneath.
3. What is the difference between a cavity and a tooth stain?
A tooth stain is a flat color change on the surface caused by coffee, tea, or food, leaving the enamel smooth. A cavity, on the other hand, weakens the tooth structure, eventually creating a rough texture, shadow, or visible hole.
4. Can you see a cavity between two teeth without an X-ray?
It is very difficult to see an interdental cavity early on. Sometimes it appears as a faint dark shadow beneath the tooth surface or causes food to get stuck repeatedly in the same spot. Dentists usually rely on digital X-rays to catch these hidden cavities early.
5. Why does my tooth have a black spot that does not hurt?
Not all cavities cause pain, especially in their early to moderate stages. Enamel has no nerve endings, so a cavity can create a visible dark spot on the enamel or outer dentin without triggering any pain signals.
6. Can a cavity disappear on its own without a filling?
If the cavity is in its very first stage (a chalky white spot on enamel), it can be reversed using fluoride and improved oral hygiene. However, once a physical hole or pit forms in the tooth, it cannot heal itself and requires a professional filling.